# Teacher MacBooks
General Q&A and user guides for district owned teacher MacBooks.
# NoMAD and H Drive Access
## Before We Begin
**If you have recently received you Mac, please restart your computer before continuing, as NoMAD requires a reboot after install for it to begin working correctly.**
H Drive access and NoMAD are on-premise tools. **They do not function outside the school networks**. Your H Drive and the T Drive will not work from your house or any other network that is not the NPS network. You must be connected to NPS-Staff or NPS-Wifi (not NPS-Guest) to use this tool.
## Accessing Your H Drive
### Step 1
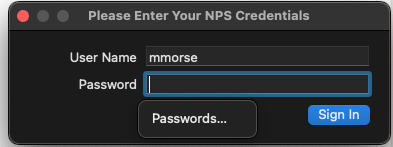
Upon logging in to your Mac, you should see this prompt:
If you don't see the login box and have tried restarting, just click the triangle icon in the top right of your screen and click sign in.
[](http://wiki.newburyport.k12.ma.us/uploads/images/gallery/2022-06/screen-shot-2022-06-06-at-1-47-43-pm.png)
Please enter the User Name and Password you use for your Newburyport account. This is the same account you use to access other district computers, as well as your email. Please note: Your username should not include @newburyport.k12.ma.us.
### Step 2
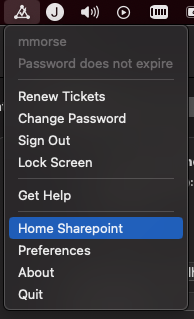
After you enter your username and password and click "Sign In", you will see the triangle and check NoMAD icon in the upper right hand corner of your screen. **If the triangle icon is empty and has no check mark, click on it, then click "Sign In" and follow the directions above in Step 1.**
[](http://wiki.newburyport.k12.ma.us/uploads/images/gallery/2022-06/screen-shot-2022-06-06-at-1-52-23-pm.png)
### Step 3
In the dropdown menu that appears click "Home Sharepoint". If you are asked for your username and password, enter the same ones you used in Step 1 and click "Remember Password".
[](http://wiki.newburyport.k12.ma.us/uploads/images/gallery/2022-06/screen-shot-2022-06-06-at-2-10-42-pm.png)
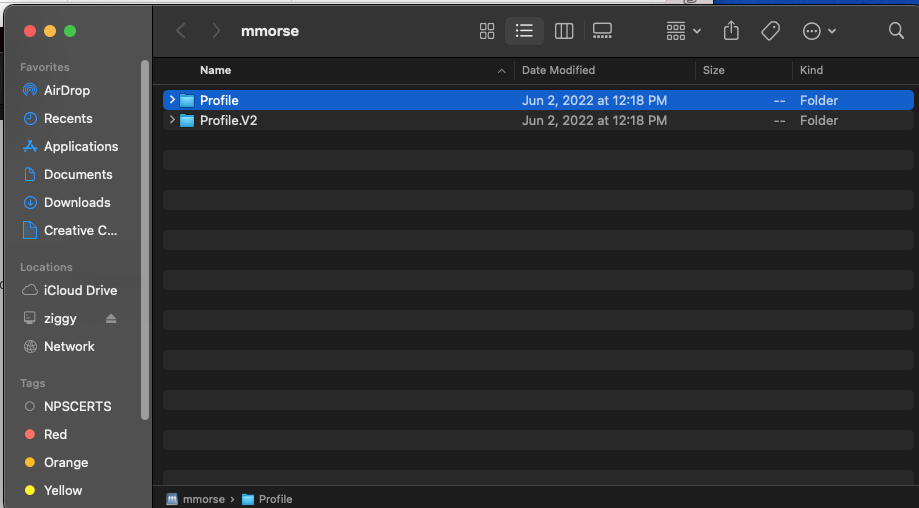
A finder window will now open and display your H Drive contents.
[](http://wiki.newburyport.k12.ma.us/uploads/images/gallery/2022-06/screen-shot-2022-06-06-at-2-26-26-pm.png)
#### Going Forward:
Whenever your mac disconnects from the network (goes home / power off / long sleep) you can reconnect to your H by clicking the NoMad shortcut (triangle with checkmark) in the top right hand corner and clicking Home Sharepoint.
[](http://wiki.newburyport.k12.ma.us/uploads/images/gallery/2022-06/screen-shot-2022-06-06-at-2-10-42-pm.png)
# Macbook FAQs and Links to Resources
## How do I project in my classroom?
Please refer to our wiki article on using your Mac with the Apple TV that's connected to your classroom projector: **[Connecting to an Apple TV from a Mac](http://wiki.newburyport.k12.ma.us/books/apple-B0e/page/connecting-to-an-apple-tv-from-a-mac)**
## How do I project elsewhere?
If you need to project to a display that is not connected to an Apple TV, please contact either the tech integrator of the building you are in, or the technology office. We can lend you an adapter to connect to an HDMI port. If this is something you do routinely, please contact the technology office for a quote to purchase an adapter.
## How do I play sound on my classroom speakers without projecting?
You can AirPlay audio from your Mac to an Apple TV. Please refer to the section of the following wiki article titled "AirPlay audio": **[Connecting to an Apple TV from a Mac](http://wiki.newburyport.k12.ma.us/books/apple-B0e/page/connecting-to-an-apple-tv-from-a-mac)**
## How do I access my H drive?
While we understand that many staff still use their H drive, we do recommend you migrate to Google Drive if possible. By using Google Drive, you can access all of your files at home, or otherwise remotely. However, H drives can still be accessed on your Mac. Please refer to the following wiki article for instructions: **[NoMAD and H Drive Access](http://wiki.newburyport.k12.ma.us/books/apple-B0e/page/nomad-and-h-drive-access)**
## Missing Software or Software Requests
The baseline software that will be automatically installed on your MacBook within a few hours of initial setup is as follows:
- Adobe Creative Cloud
- Google Chrome
- Google Drive
- Jamf School (allows you to quickly install optional software)
- Microsoft Office
- Microsoft Teams
- NoMAD (allows H drive access and access to other network resources, syncs passwords)
- T Drive (Homemade application for T drive access, only works on school premises, still in testing)
- Zoom
Optional software is available on your Mac using the Jamf tool. You can browse and install optional software by clicking on the "J" icon in the upper right hand corner of your screen.
If you have any other software requests for software you cannot install yourself, please put in a ticket and we can see about purchasing or deploying software. Please include a link to the software you need as well as a list of people who need it.
## What accessories work with the new mac?
We wrote an accessories guide for anyone wanting to purchase accessories for their laptop: **[M1 MacBook Optional Accessories Guide](http://wiki.newburyport.k12.ma.us/books/apple-B0e/page/m1-macbook-recommended-accessory-guide)**
# macOS First Start and Enrollment Guide
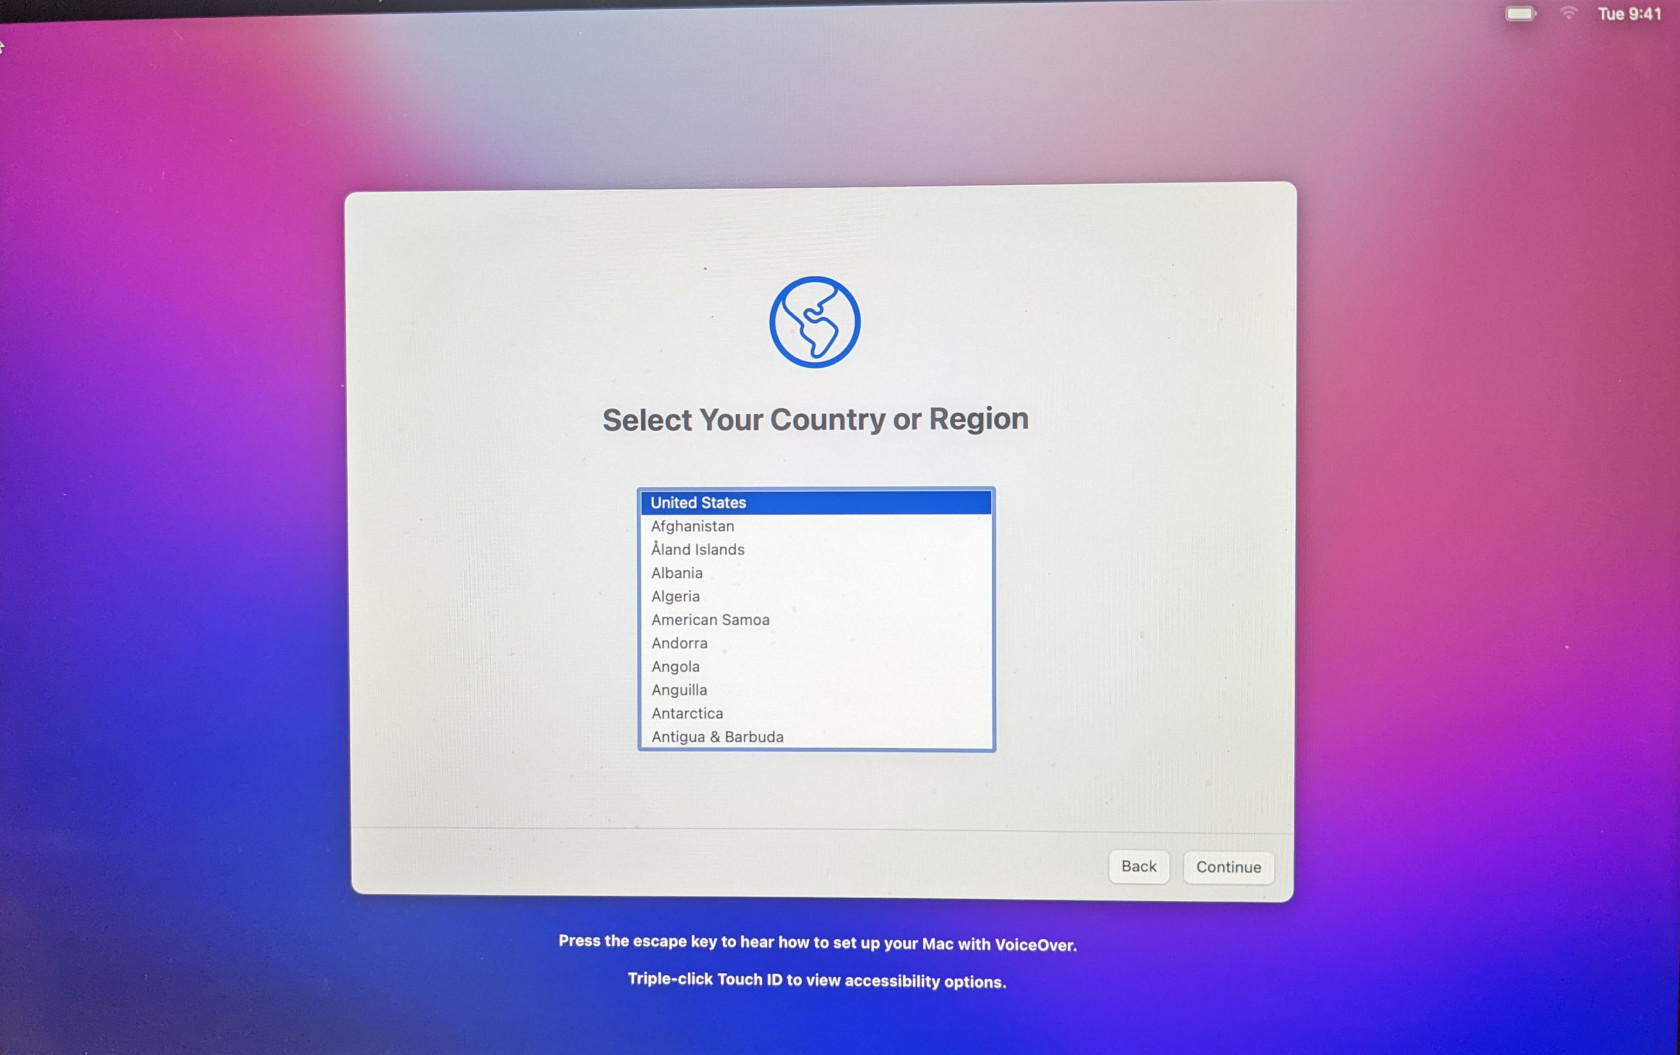
On starting your Mac, you will be asked to "Select Your Country or Region".
Select **United States** and click **Continue**.
[](http://wiki.newburyport.k12.ma.us/uploads/images/gallery/2022-06/vpApxl-20220607-164118771.jpg)
You will now see "Accessibility". If you have accessibility needs, please explore this section. Otherwise, click **Continue**.
[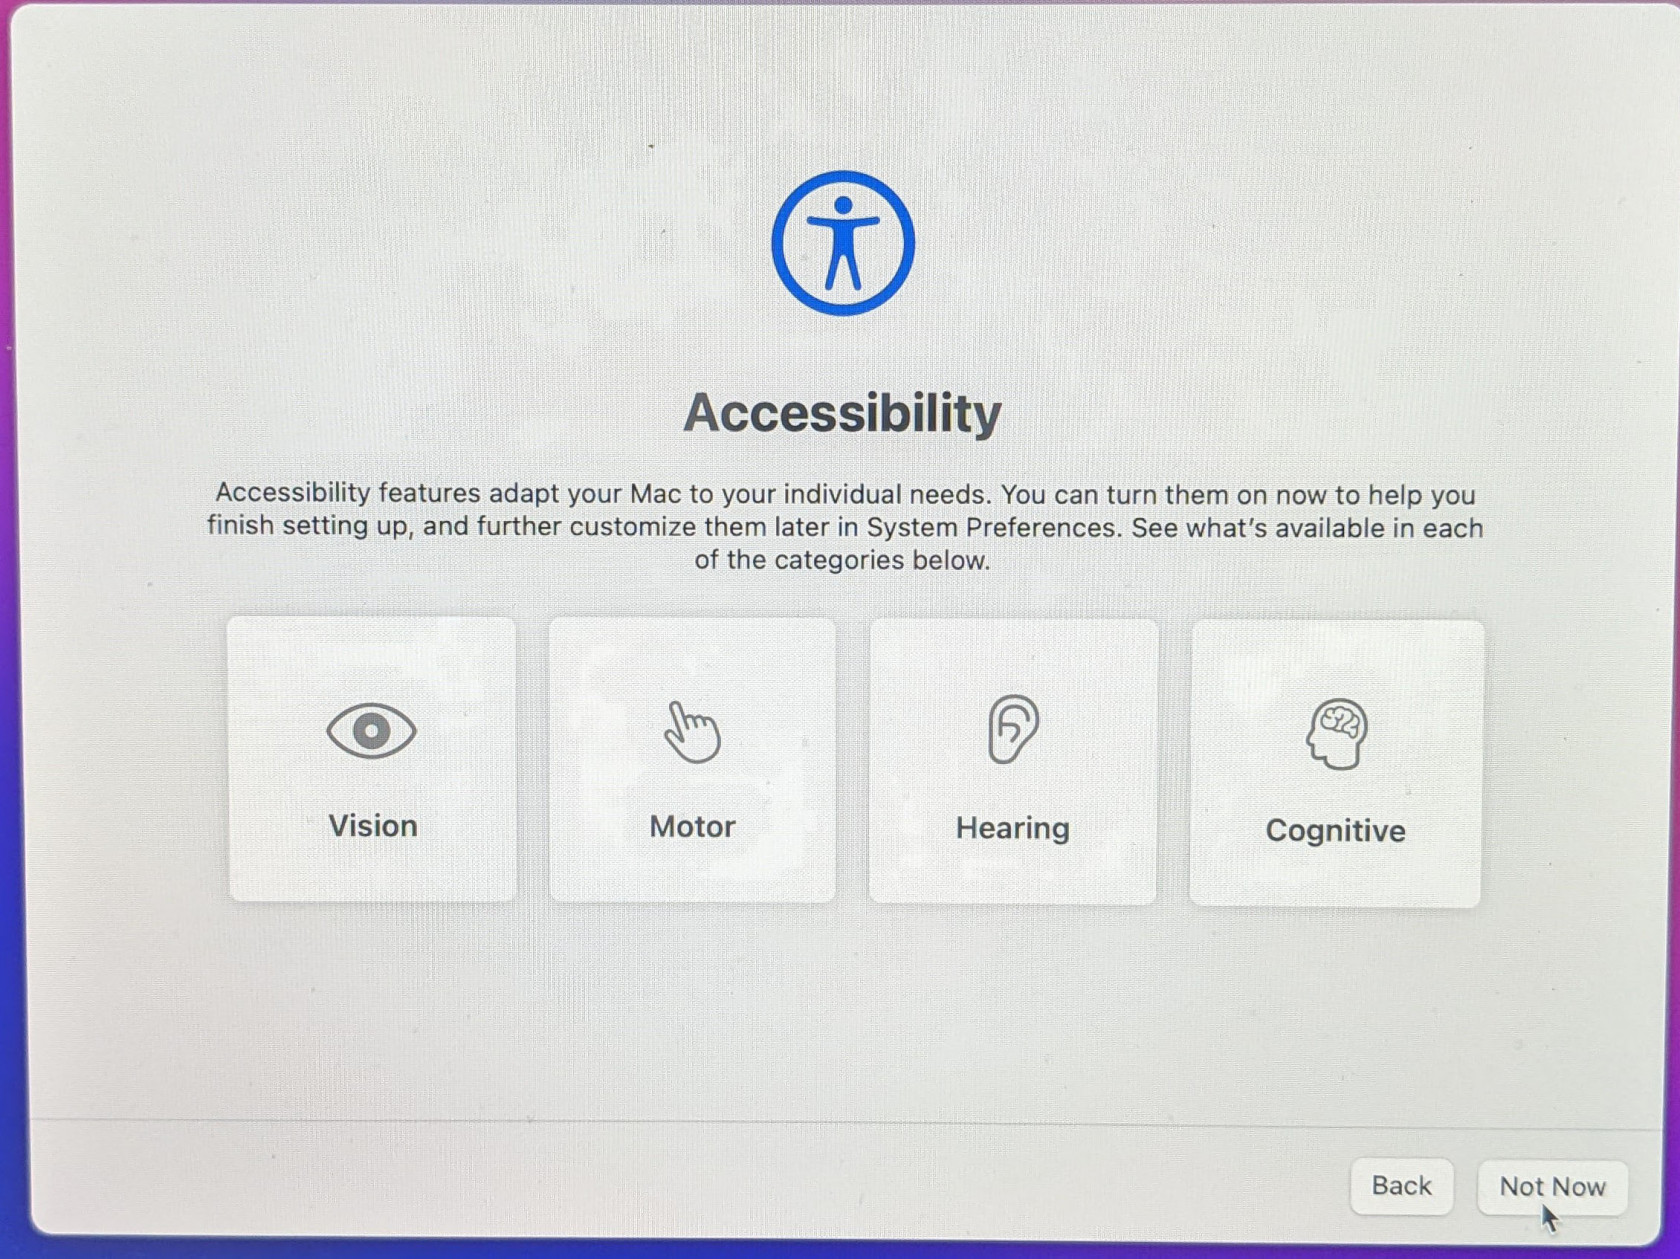](http://wiki.newburyport.k12.ma.us/uploads/images/gallery/2022-06/pxl-20220607-164127308-1.jpg)
Under "Select Your Wi-fi Network" select **NPS-Guest** and hit **Continue**.
After your computer enrolls, it will automatically switch from NPS-Guest to one of our managed networks.
[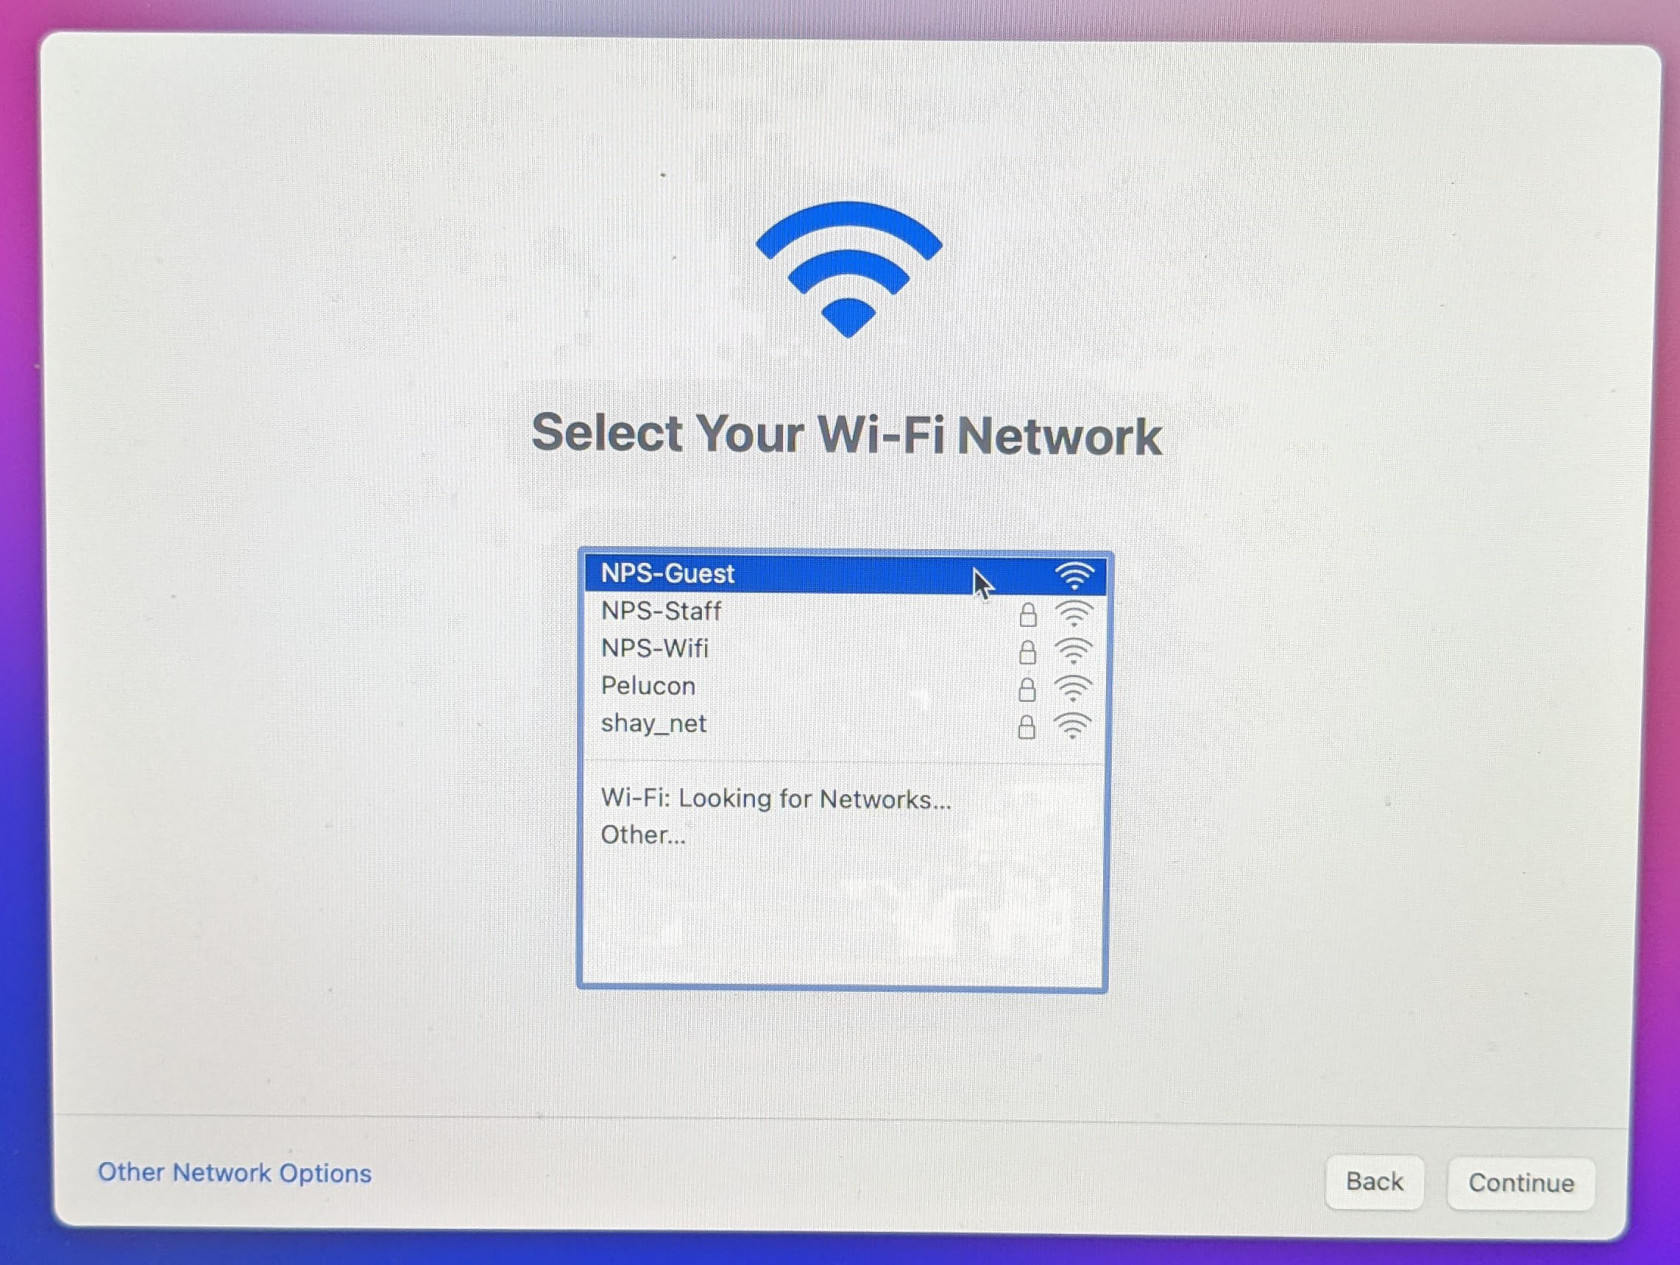](http://wiki.newburyport.k12.ma.us/uploads/images/gallery/2022-06/pxl-20220607-164136684-1.jpg)
After a short wait, you will see the "Remote Management" screen. Click **Continue**.
[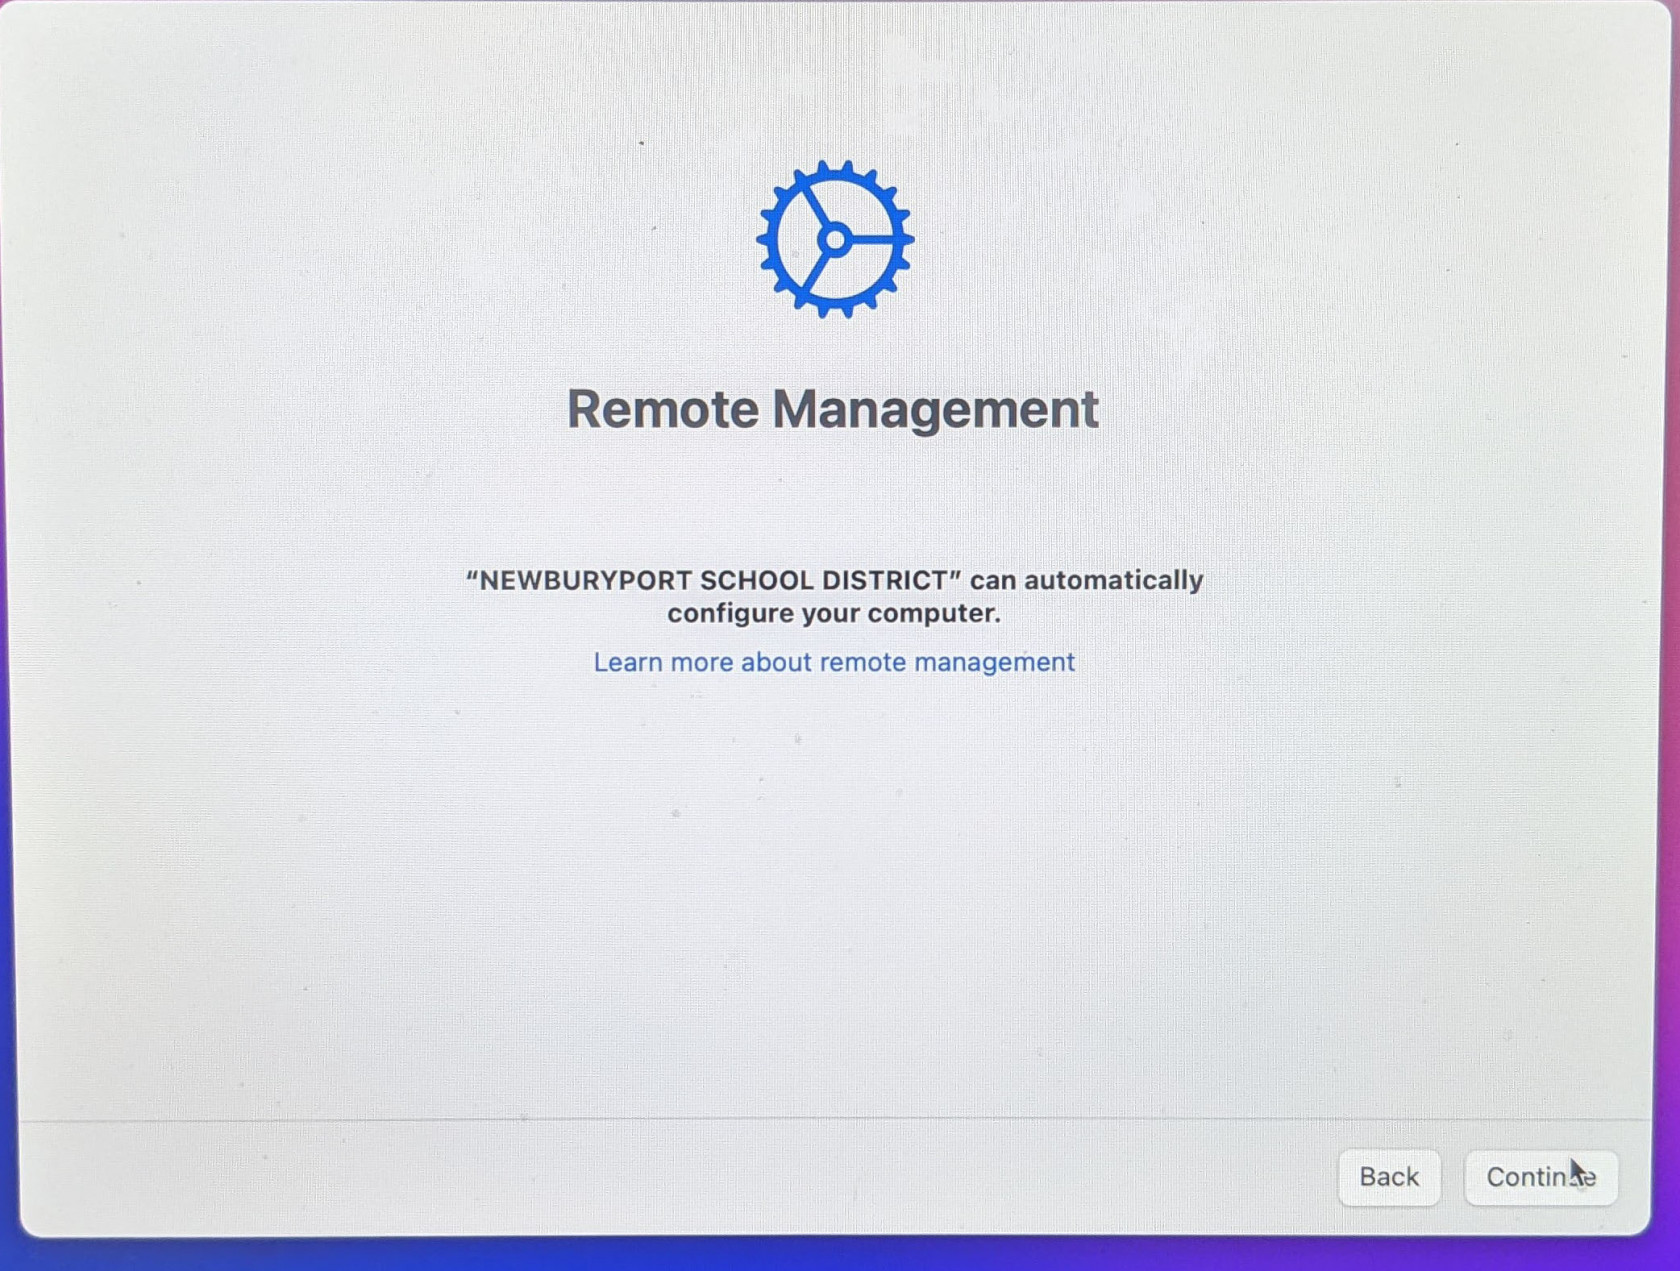](http://wiki.newburyport.k12.ma.us/uploads/images/gallery/2022-06/pxl-20220607-164157845-1.jpg)
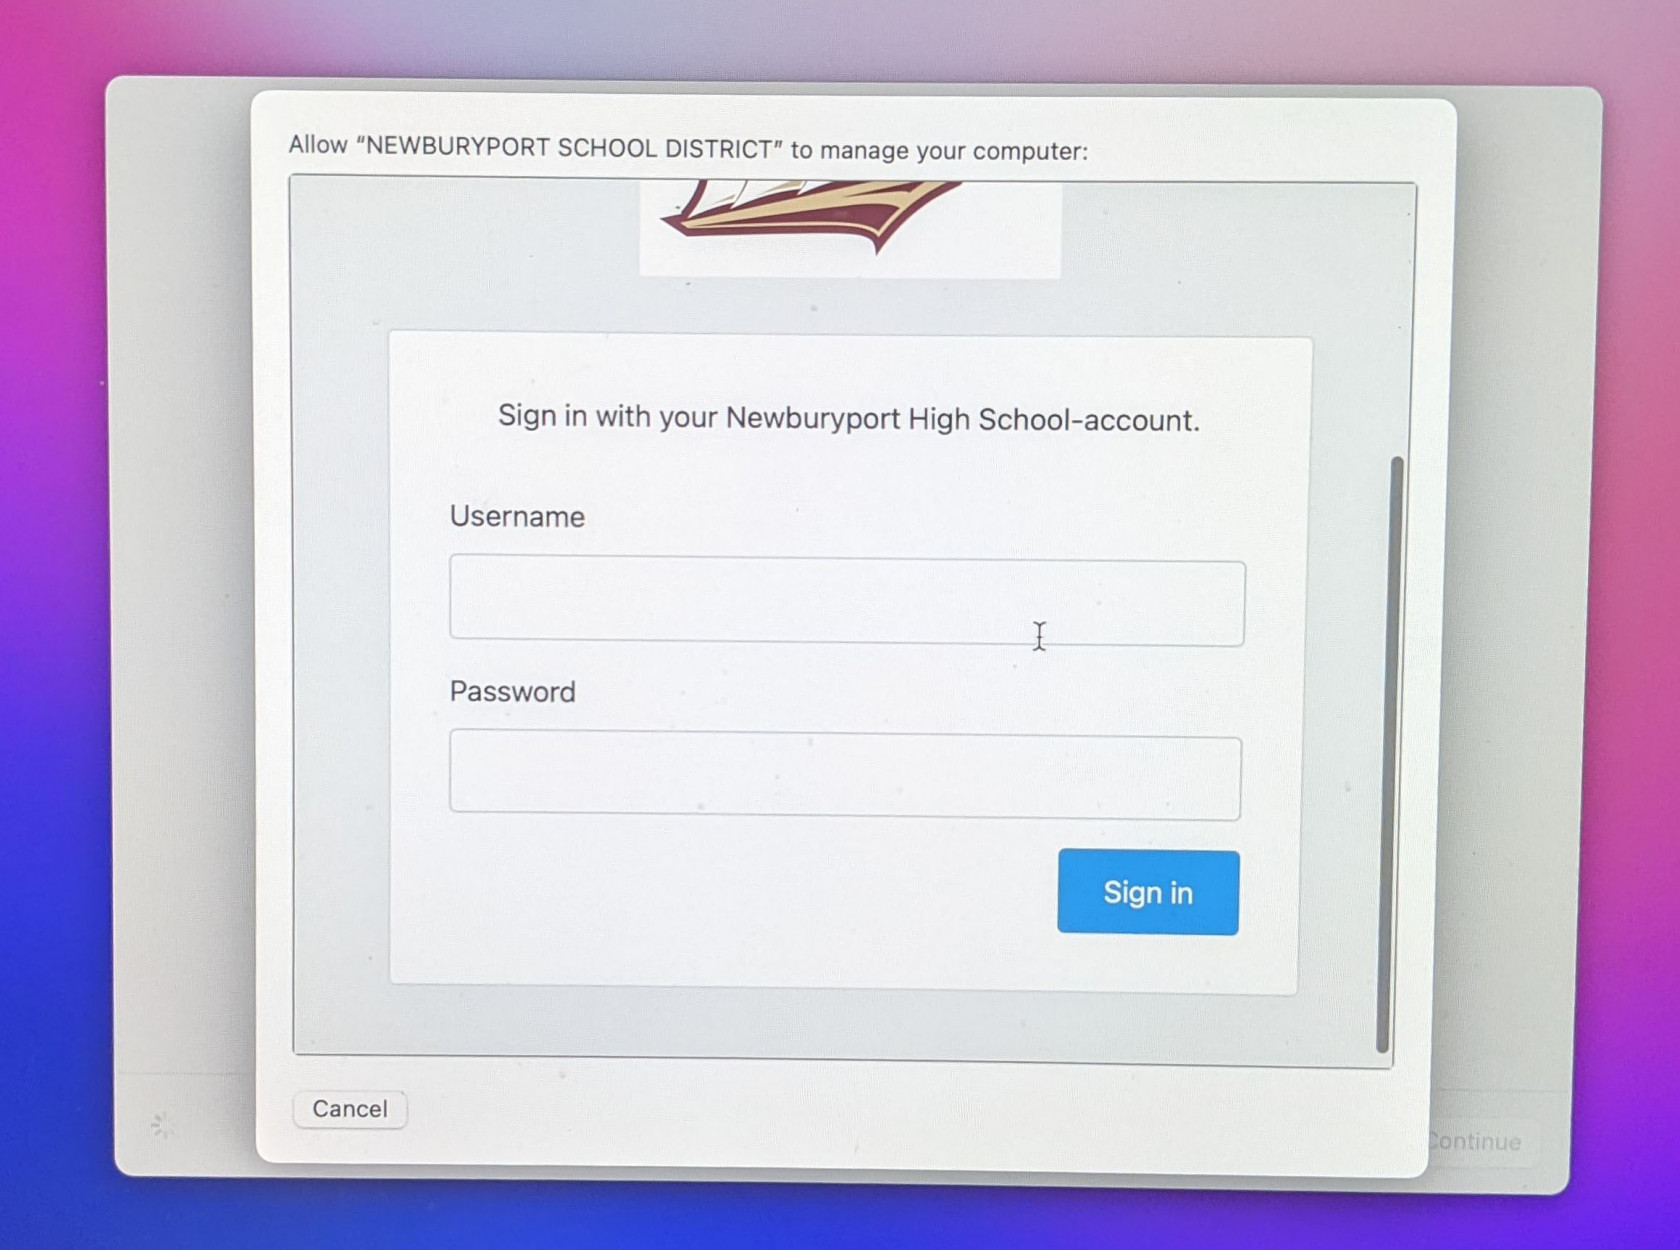
After a few moments, you will a sign-in screen.
Use **two fingers on the touchpad** to scroll down to see the **Username** and **Password** fields.
Enter your **Username** and **Password** for your Newburyport account. These are the same credentials you use for PCs in the district, school Chromebooks, and your email. However, please make sure you are not entering your full email address.
Click **Sign in**.
[](http://wiki.newburyport.k12.ma.us/uploads/images/gallery/2022-06/ycvpxl-20220607-164212520.jpg)
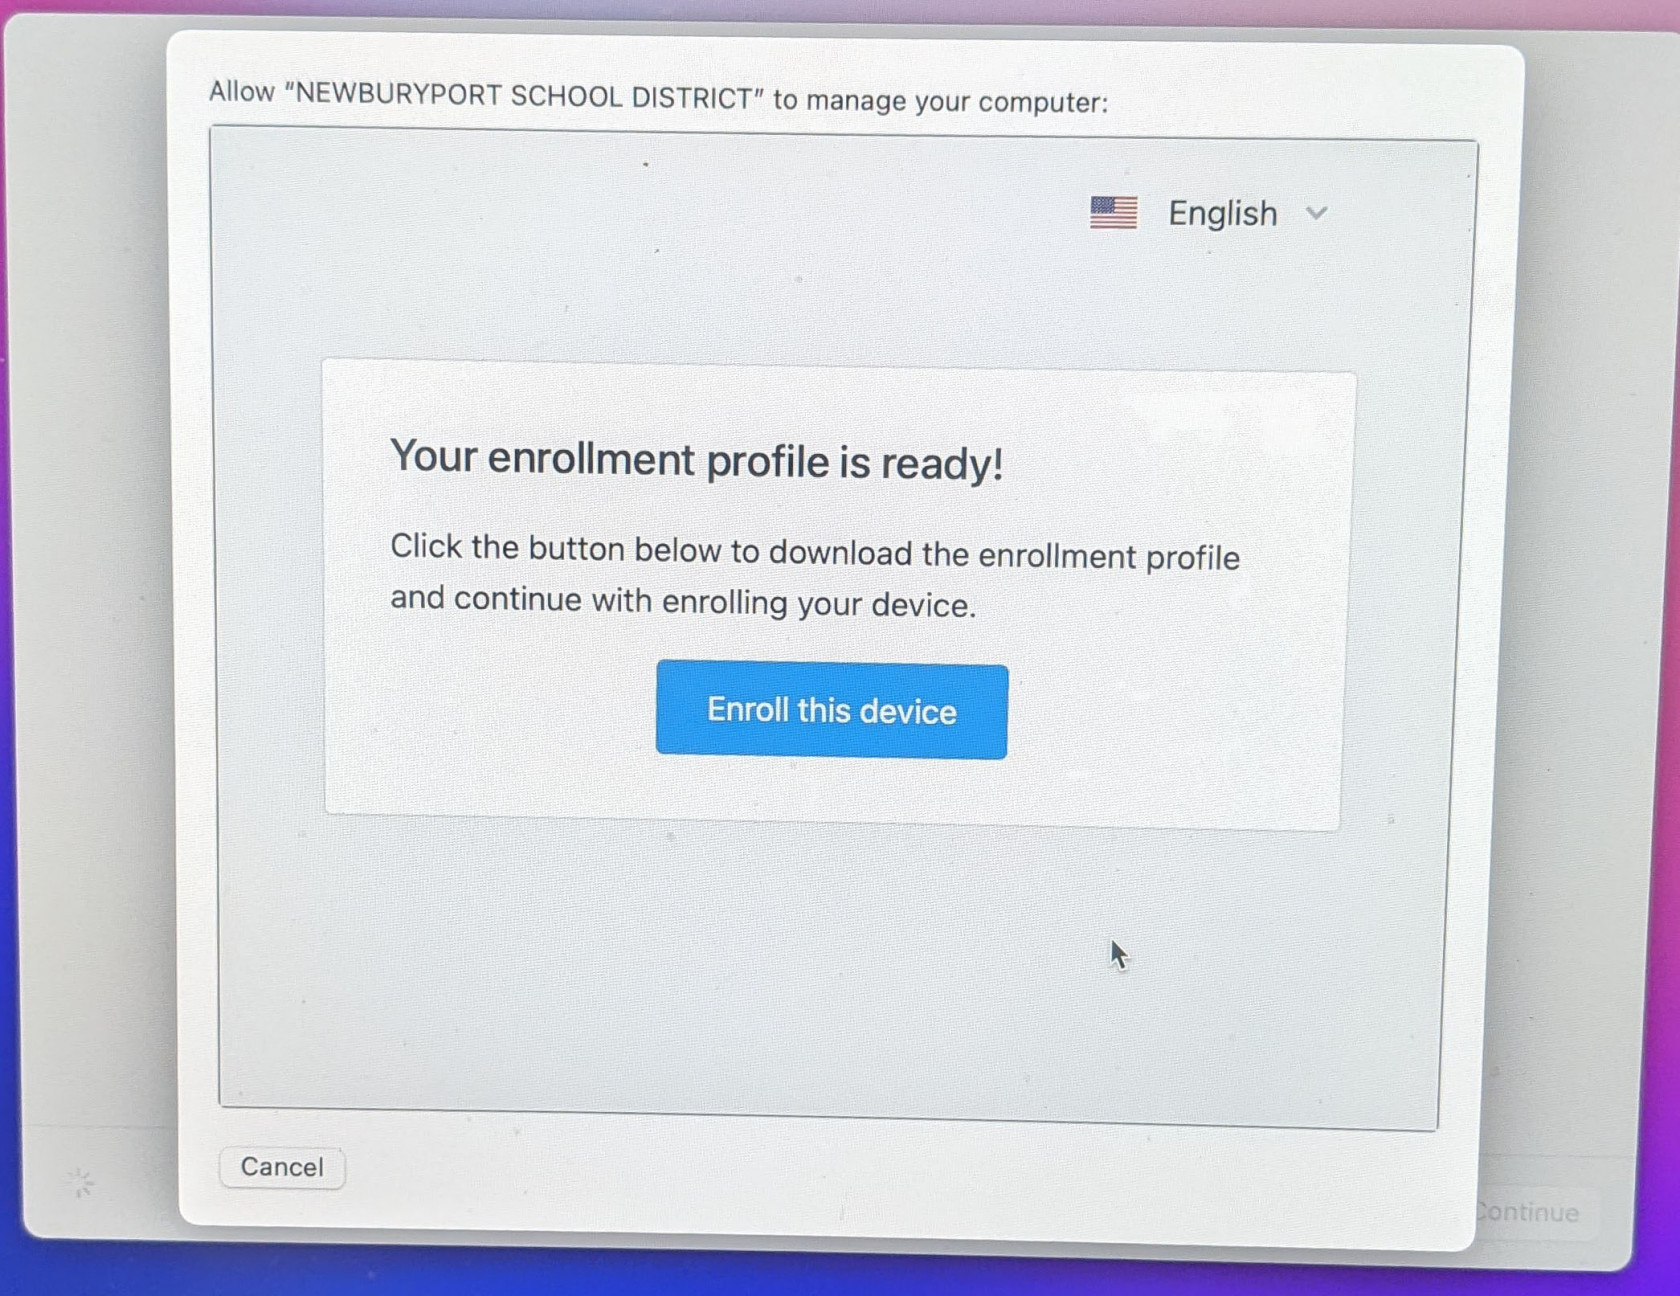
You will then see a screen stating "Your enrollment profile is ready!".
Click **Enroll this device**.
[](http://wiki.newburyport.k12.ma.us/uploads/images/gallery/2022-06/pC1pxl-20220607-164227161.jpg)
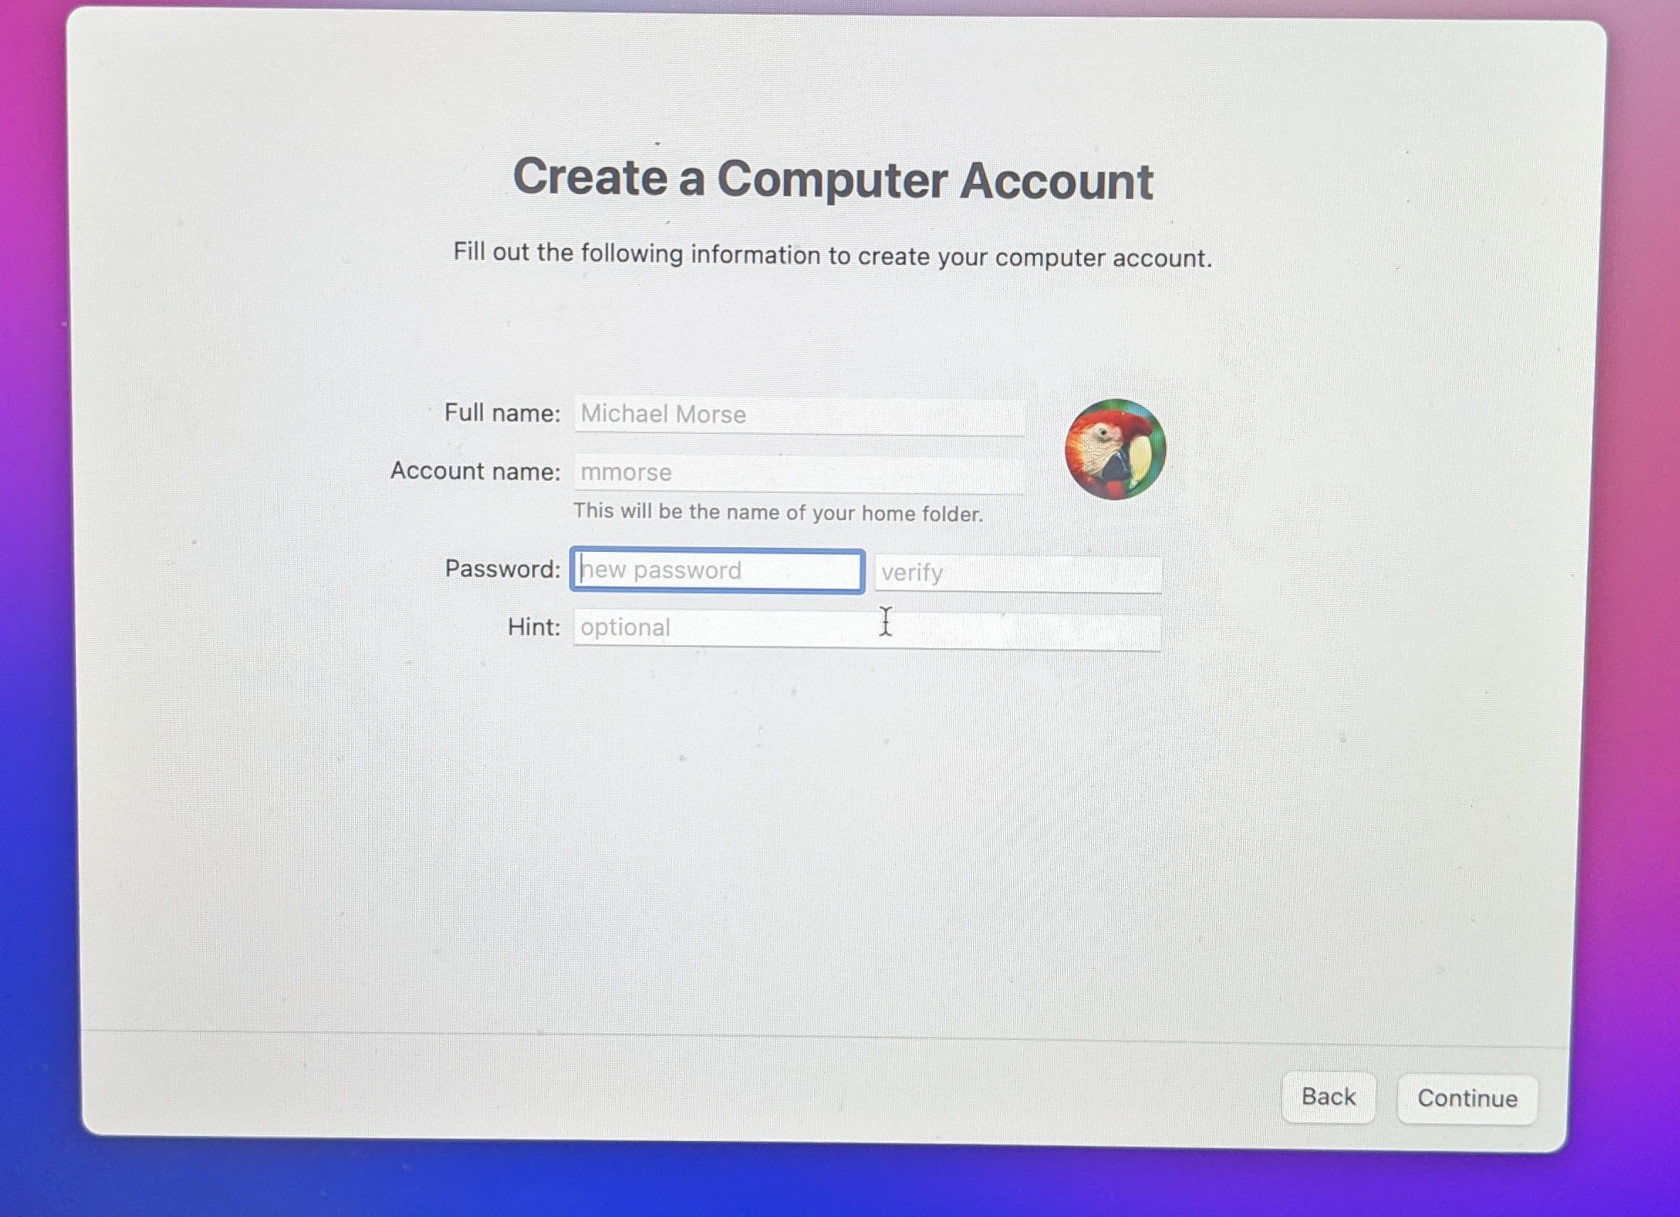
The next screen will be titled "Create a Computer Account". Please enter the password for your Newburyport account.
**This password must be the same as the one you just entered to enroll.**
Enter your password twice to confirm and click **Continue**.
[](http://wiki.newburyport.k12.ma.us/uploads/images/gallery/2022-06/9jwpxl-20220607-164243514.jpg)
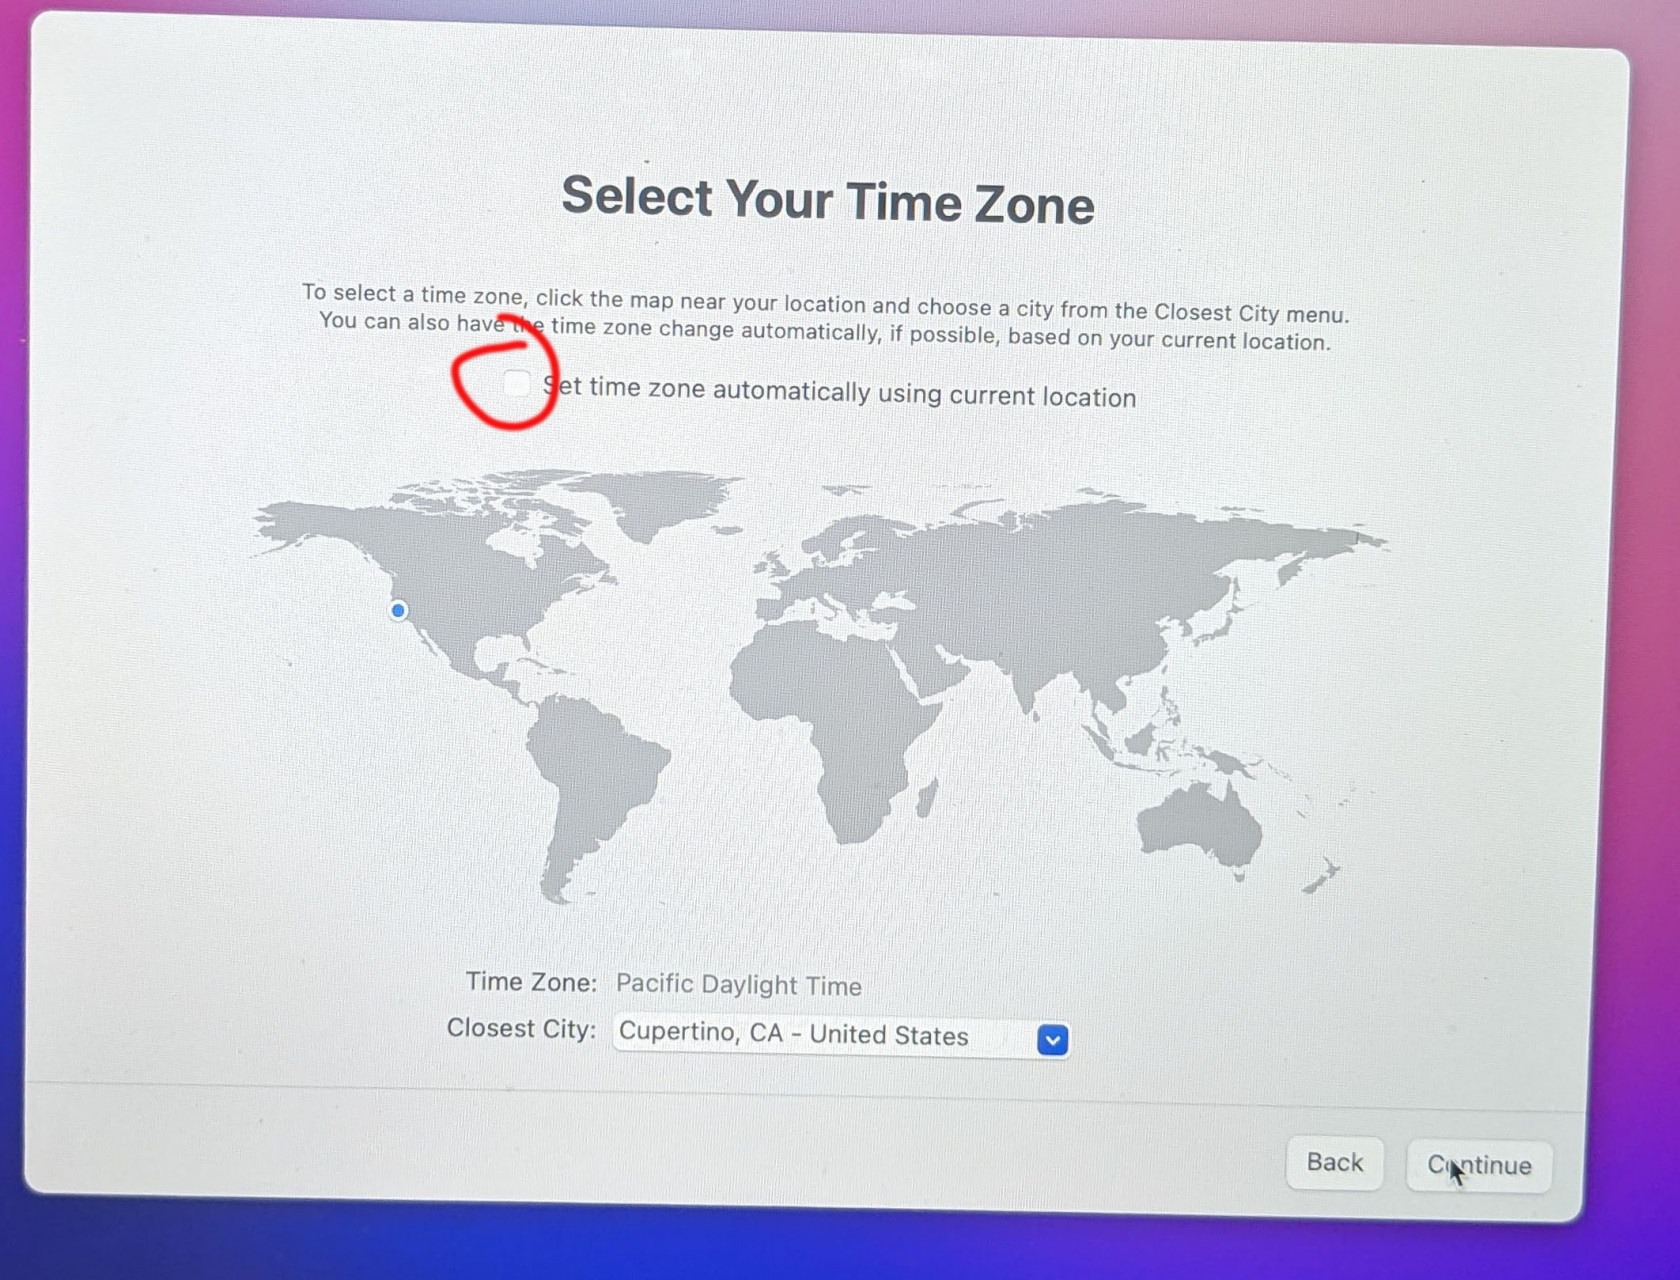
On the "Select Your Time Zone" screen, select **Set time zone automatically using current location**.
[](http://wiki.newburyport.k12.ma.us/uploads/images/gallery/2022-06/AT8pxl-20220607-164334008.jpg)
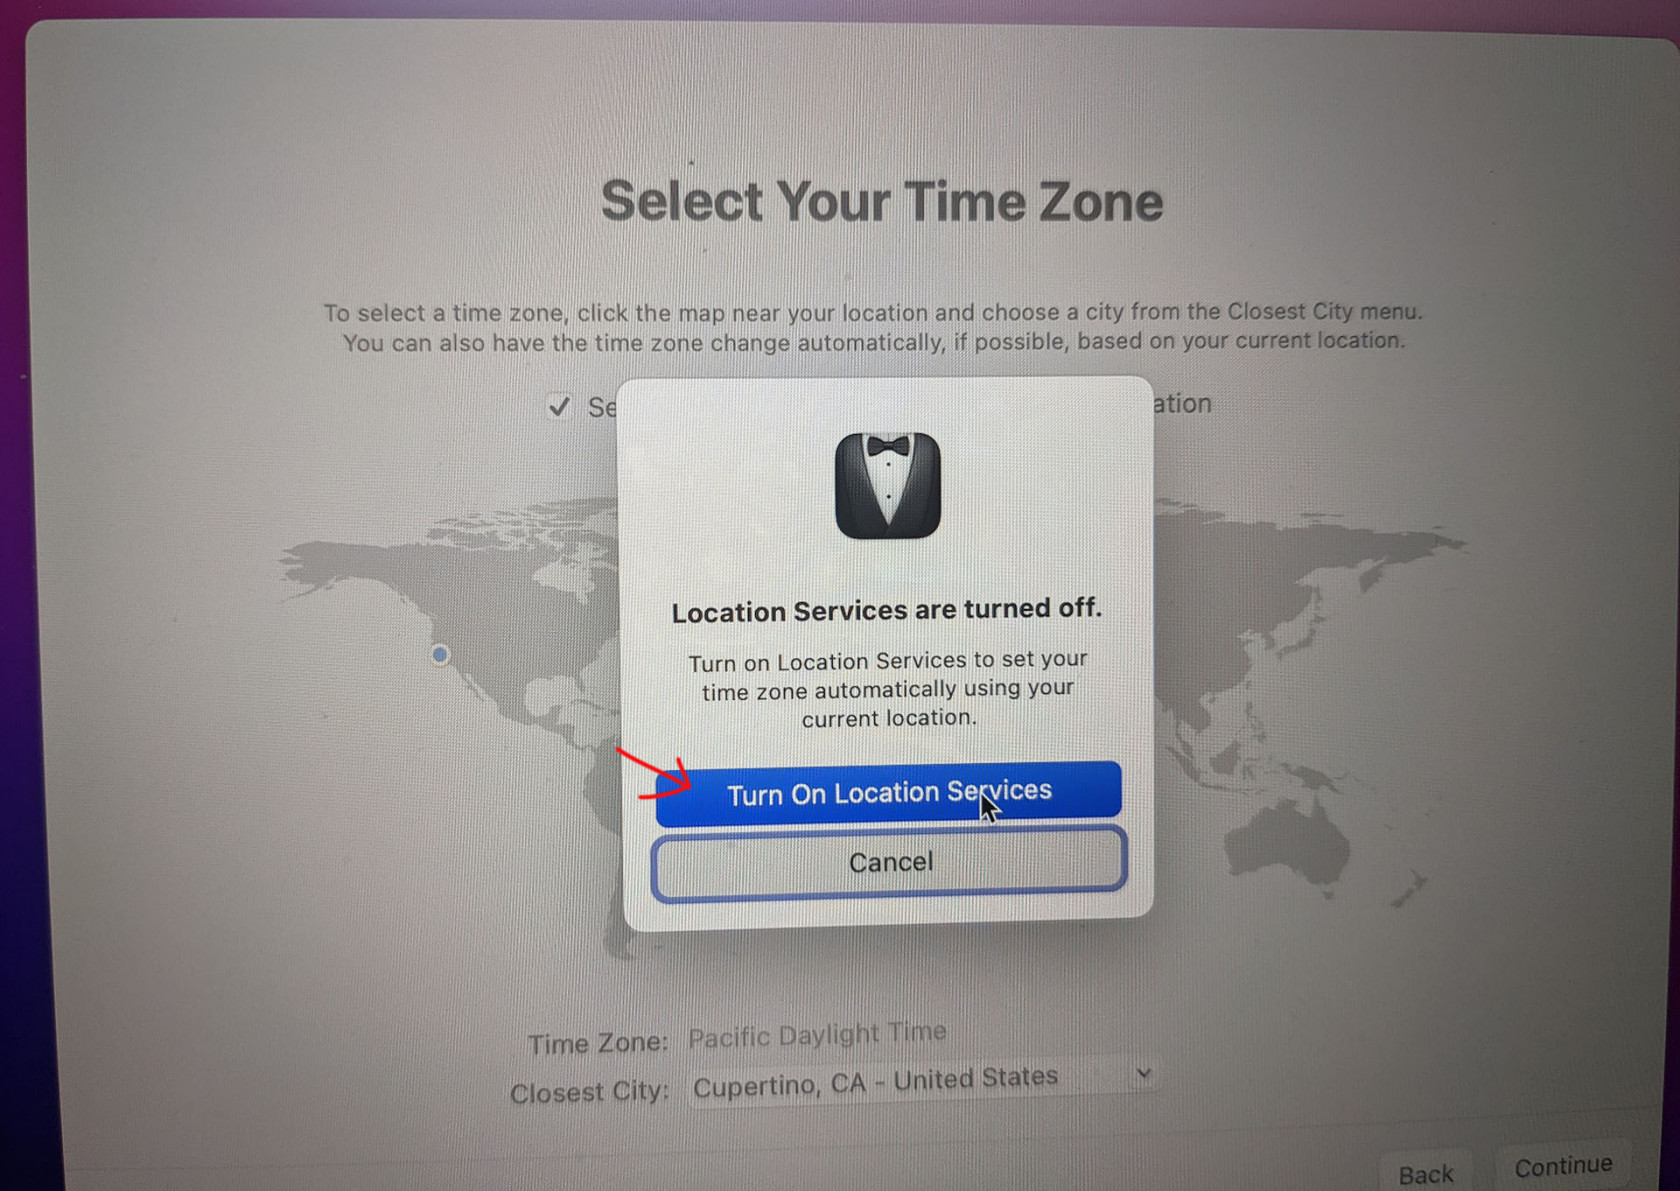
When prompted, click **Turn On Location Services**.
[](http://wiki.newburyport.k12.ma.us/uploads/images/gallery/2022-06/pxl-20220607-164341832.jpg)
After a short wait, you will be brought to your desktop. **You are now enrolled!** Feel free to start using your computer.
The default software package will install over the next hour. This includes Microsoft Office, Google Chrome, Google Drive, and Mac specific tools we will explain in detail elsewhere in the wiki. Feel free to use your computer while these steps finish up.
[](http://wiki.newburyport.k12.ma.us/uploads/images/gallery/2022-06/pxl-20220607-164406236.jpg)
# M1 MacBook Optional Accessories Guide
While the classrooms are keeping wired monitors, keyboards and mice from the previous setups, many have asked what accessories they could purchase for these devices that will be compatible and reliable.
We have provided a list of different accessories that are recommended by us and compatible with the new MacBook Airs.
## Mice
### Best budget mouse:
#### [Logitech M535 Bluetooth Mouse ~ $28](https://www.amazon.com/Logitech-M535-Bluetooth-Mouse-Wireless/dp/B0148NPIQK/ref=sr_1_4?crid=10K1G4ZFHNDO5&keywords=bluetooth+logitech+mouse&qid=1654711798&sprefix=bluetooth+logitech+mouse%2Caps%2C61&sr=8-4) **[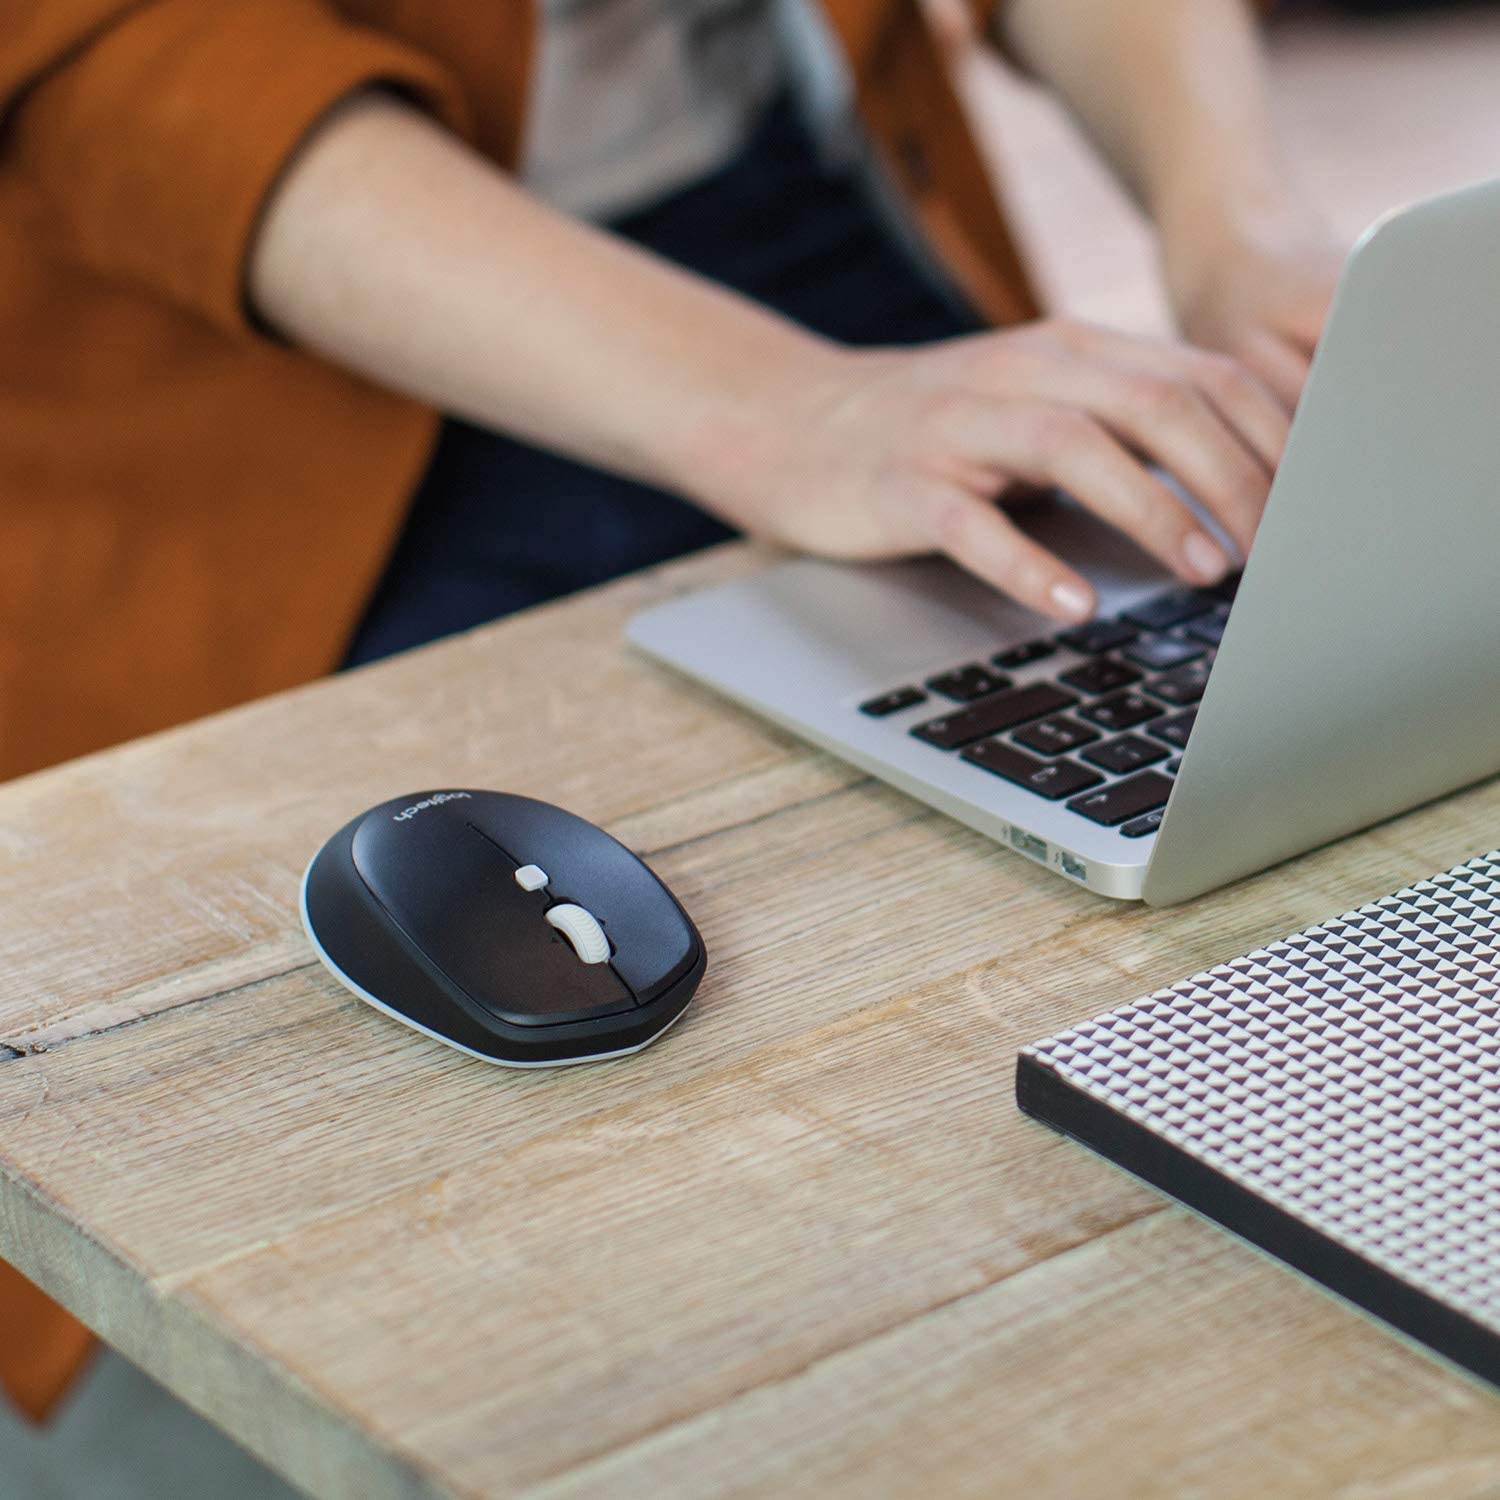](http://wiki.newburyport.k12.ma.us/uploads/images/gallery/2022-06/71g8zgvzbl-ac-sl1500.jpg)**
| Pros | Cons |
| - **Compact**
- **Reliable**
- **Inexpensive**
- **Up to 10 months of charge on a single AA battery**
| - **Not ideal for large hands**
- **Bluetooth only (potentially an issue for some non MacBook devices)**
|
### Best compact mouse:
#### [Satechi M1 ~ $30](https://www.amazon.com/Satechi-Aluminum-Bluetooth-Wireless-Rechargeable/dp/B07NYB3HMC)
**[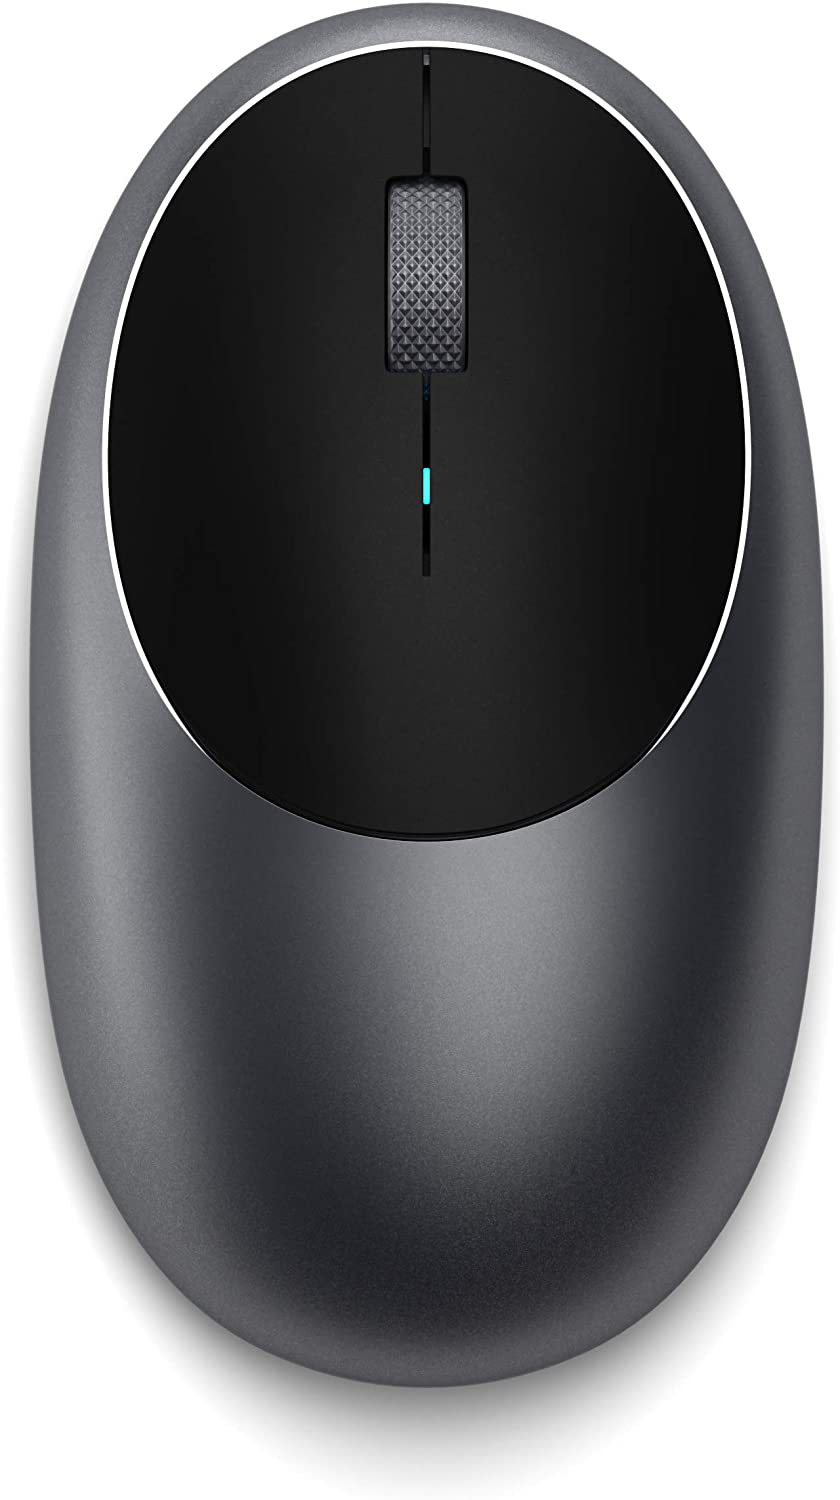](http://wiki.newburyport.k12.ma.us/uploads/images/gallery/2022-06/71iwprxkfkl-ac-sl1500.jpg)**
| Pros | Cons |
| - **Compact**
- **Inexpensive**
- **Rechargeable**
| - **Not ideal for large hands**
- **May require more frequent charging than others**
|
### Best full size mouse:
#### [Logitech Triathalon M720 ~ $40](https://www.amazon.com/Logitech-Triathlon-Bluetooth-Hyper-Fast-Scrolling/dp/B087Z6LSHW/ref=pd_lpo_1?pd_rd_i=B087Z6LSHW&psc=1)
[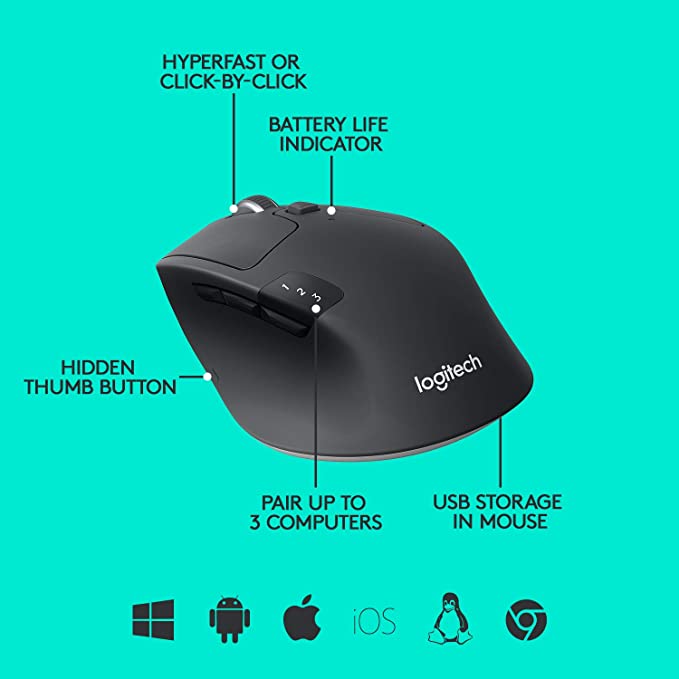](http://wiki.newburyport.k12.ma.us/uploads/images/gallery/2022-06/610t4bqaqdl-ac-sx679.jpg)
### Best touch gesture capable mouse:
#### [Apple Magic Mouse 2 ~ $80](https://www.apple.com/shop/product/MK2E3AM/A/magic-mouse-white-multi-touch-surface)
#### [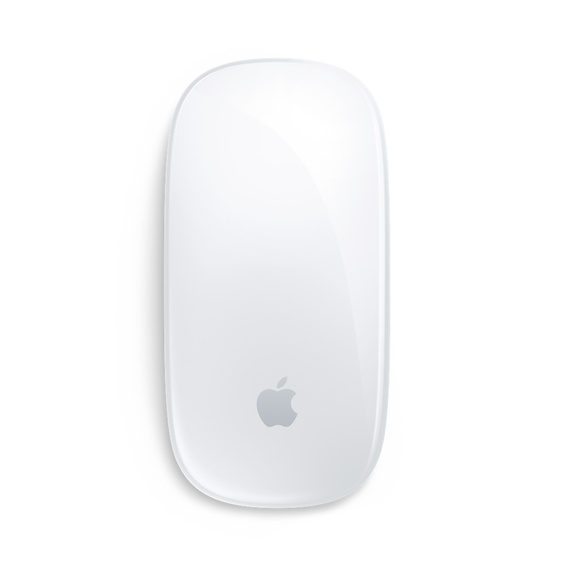](http://wiki.newburyport.k12.ma.us/uploads/images/gallery/2022-06/image-1654716818277.png)
| Pros | Cons |
| - **Supports touch gestures (pinch to zoom, swipe etc.)**
- **Compact**
- **Rechargeable battery**
| - **Price**
- **Mouse cannot be used while charging**
- **No physical scroll wheel**
- **Uncomfortable for large hands**
|
## Cases
Any 13.3" laptop sleeve or bag should work fine with the M1 MacBook Air. Here is just an example of something that works.
#### [13-14" laptop sleeve on Amazon ~ $15](https://www.amazon.com/MOSISO-Protective-Compatible-Polyester-Organizer/dp/B08ZSVG3YZ/ref=sr_1_19?crid=8KE8PE6ZEV1J&keywords=macbook+air+sleeve&qid=1654780149&sprefix=macbook+air+sleeve%2Caps%2C60&sr=8-19)
## Adapters and Dongles
While your classroom will be equipped with a keyboard monitor and mouse, many have asked about buying simple adapters to use as accessories at home. Here are some examples of affordable compatible options.
### USB Adapter
Simple adapter for plugging in mice / cameras / flash drives and other full size USB devices:
#### [Full size USB to USB C adapter - 2 pack ~ $9](https://www.amazon.com/JSAUX-Adapter-Compatible-MacBook-Samsung/dp/B07BS8SRWH/ref=sr_1_9?crid=17L0N168F78MR&keywords=usb+a+to+C&qid=1654780350&sprefix=usb+a+to+c%2Caps%2C63&sr=8-9)
[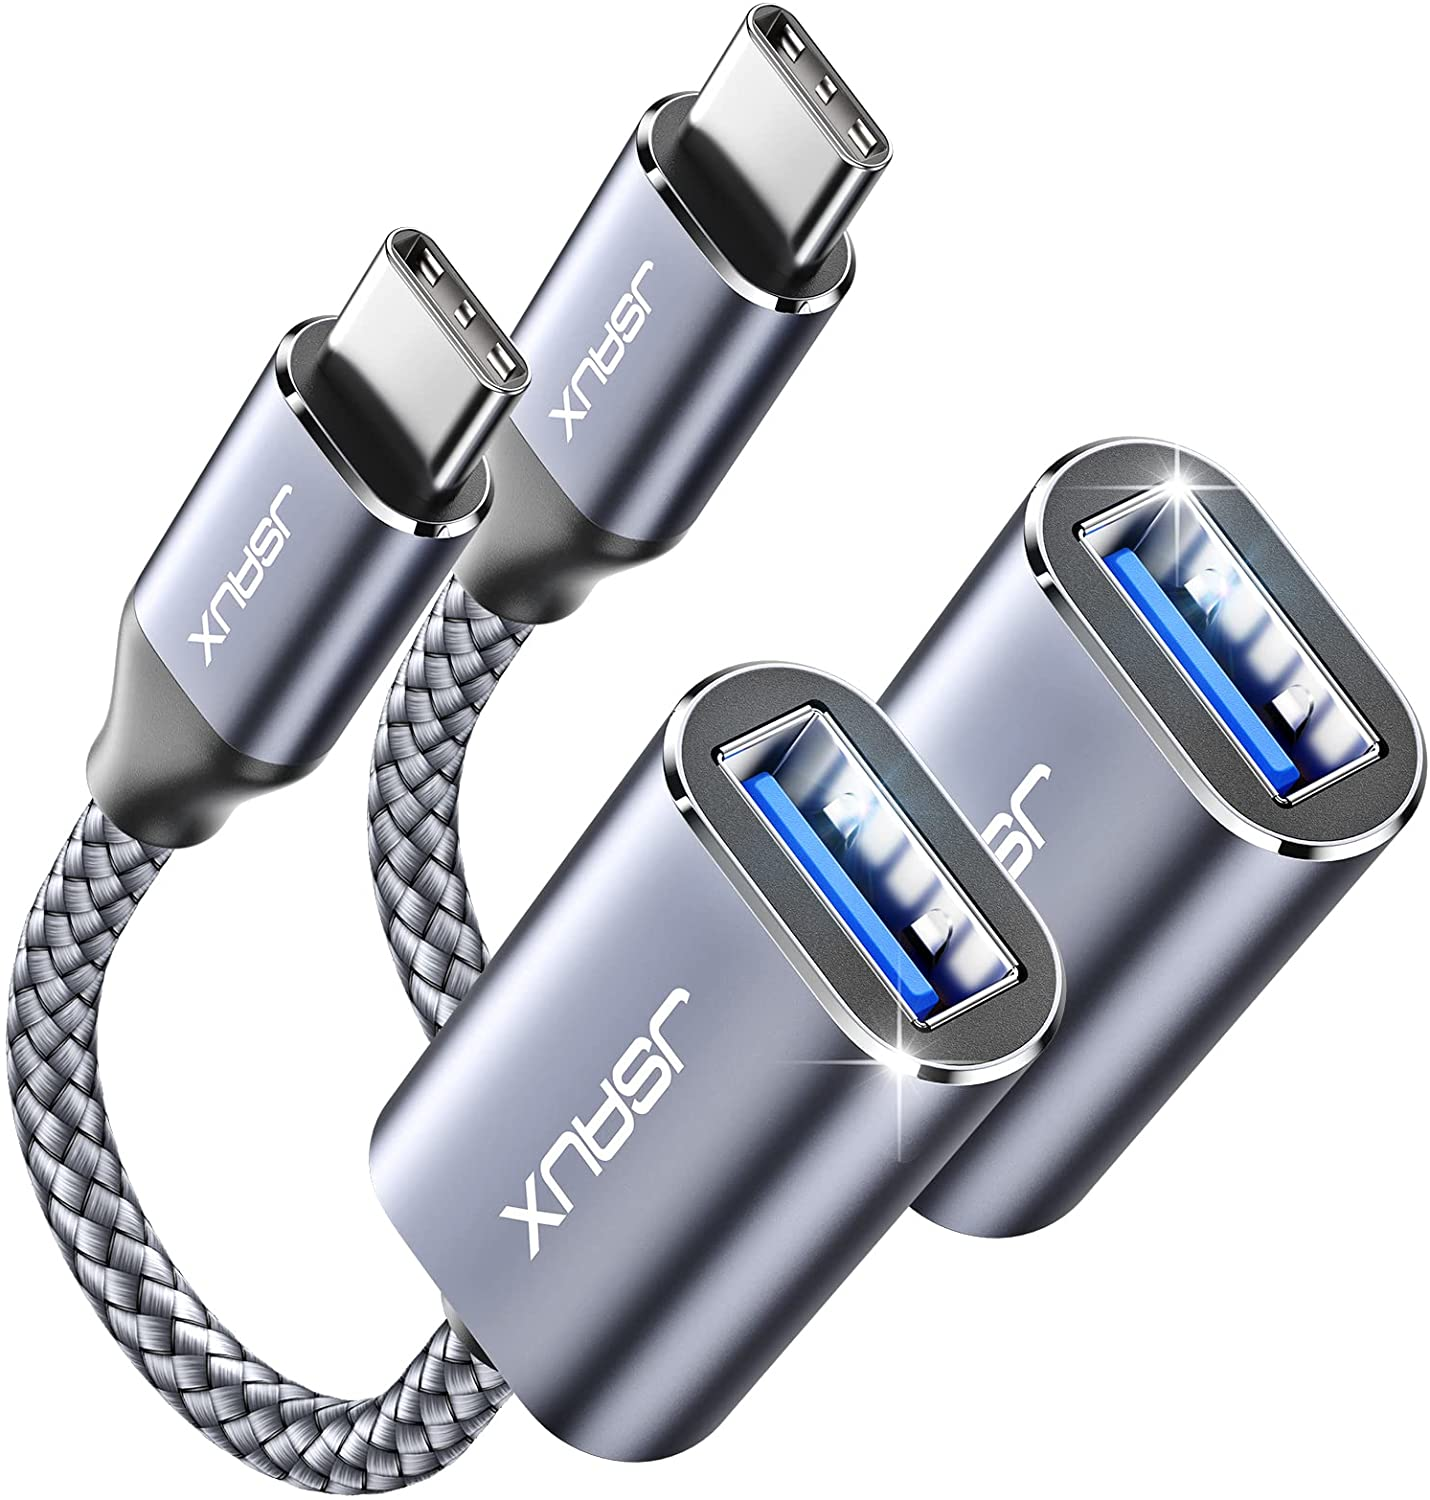](http://wiki.newburyport.k12.ma.us/uploads/images/gallery/2022-06/image-1654780413300.png)
### HMDI Adapter
Connect two USB devices and an HDMI device (Monitor/TV/Projector, etc.) to your Mac over a single USB-C port.
#### [HDMI + 2 USB ports adapter ~ $25](https://www.amazon.com/Anker-Adapter-Delivery-Charging-ChromeBook/dp/B07L3W79R3/ref=sr_1_22?crid=36HS5VJD1Z6S3&keywords=M1+mac+anker&qid=1654780572&sprefix=m1+mac+anker%2Caps%2C58&sr=8-22)
##### [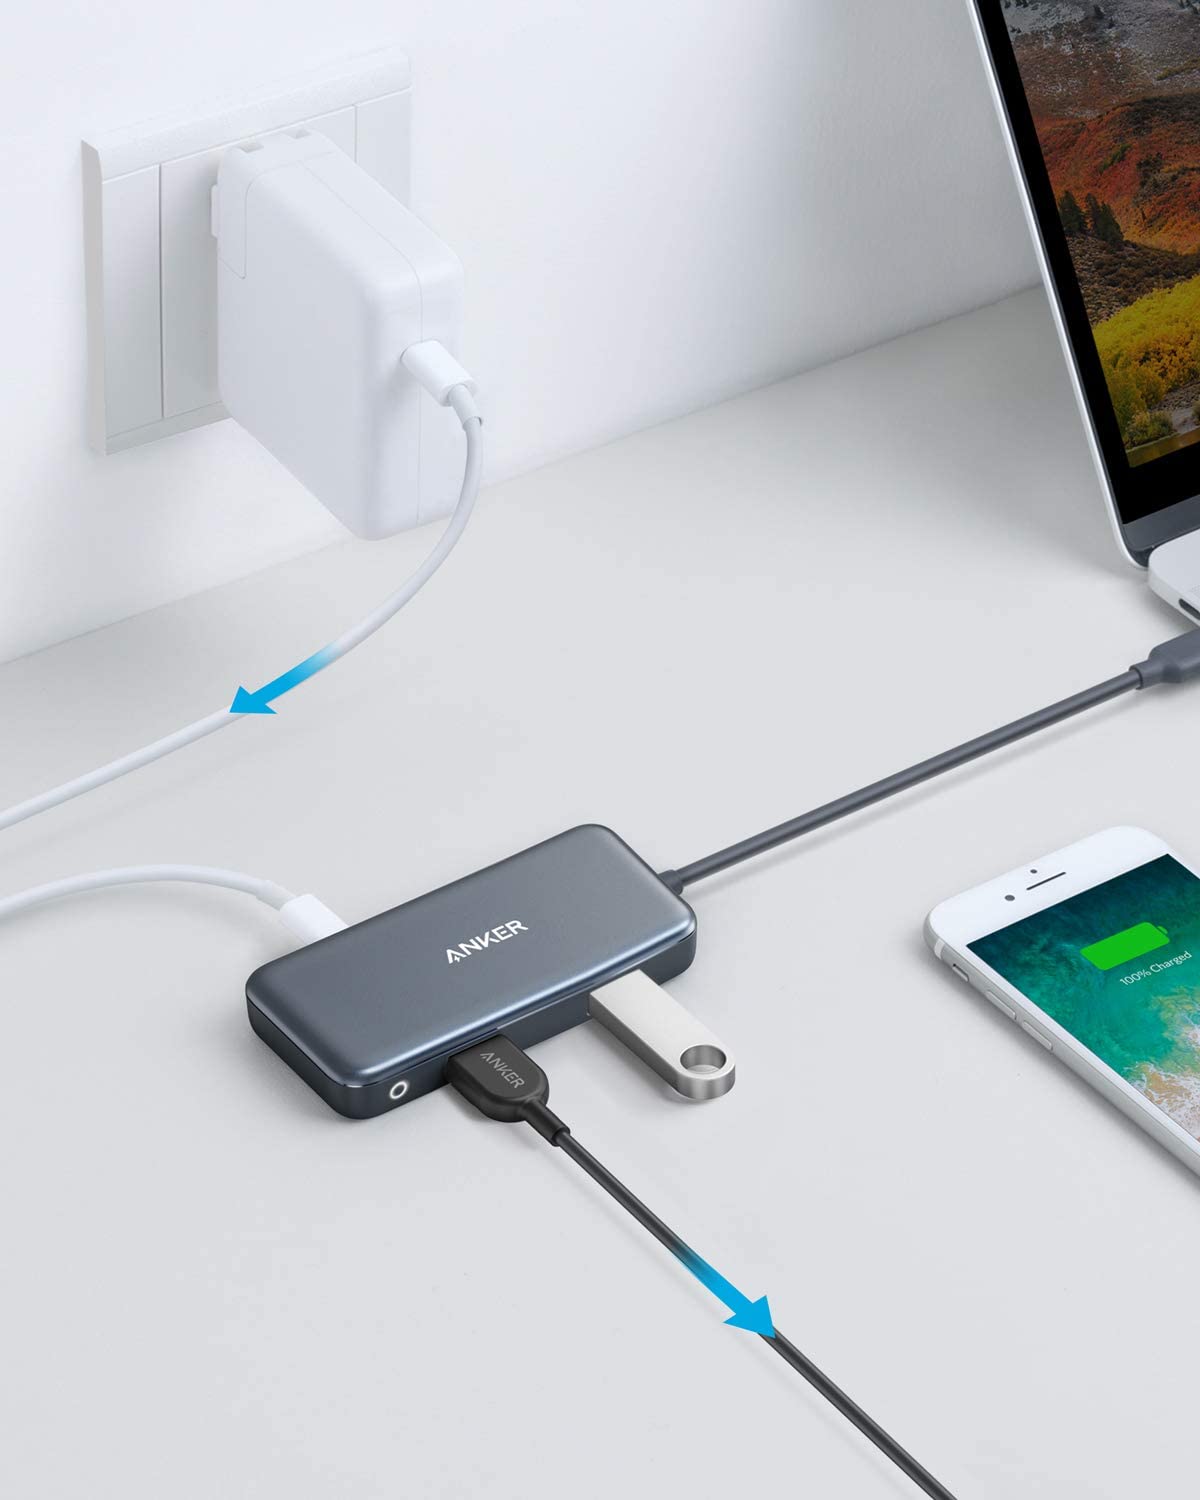](http://wiki.newburyport.k12.ma.us/uploads/images/gallery/2022-06/61a49wbyi5l-ac-sl1500.jpg)
# Connecting to an AppleTV from a Mac
#### **Screen Mirroring**
**Screen Mirroring will duplicate your display on the projector/TV, and is suitable for general content. If Playing long form content from a streaming service like netflix, it is recommended to just play the content on the apple TV itself.**
**To start Mirroring:**
1. Open Control Center:
- Click the  icon in the upper-right corner of the screen.
2. Click Screen Mirroring  .
3. Select your Apple TV, from the list, it should be named after your classroom.
4. If an AirPlay passcode appears on your projector/TV screen Simply enter the password on the device.
5. if you wish to use the projector as an independent display (extend mode), select Use as separate display from the screen mirror menu.
[](http://wiki.newburyport.k12.ma.us/uploads/images/gallery/2022-06/image-1654536348386.png)
####
####
####
####
#### **Connecting with Airplay**
**Airplay will open media currently playing on your mac on the appleTV. This does not duplicate the display, allowing you to perform other tasks on your device while the media plays. This is preferred for projecting things like longer videos or music. Note: Currently air playing video feature only works in the Safari web browser.**
**Air playing video (IN SAFARI)**
1\. On a supported site, such as youtube or many other web video sources, Press the Airplay button  in the corner of the video.
[](http://wiki.newburyport.k12.ma.us/uploads/images/gallery/2022-05/screen-shot-2022-05-23-at-10-47-35-am.png)
2\. If asked to select, choose Airplay & bluetooth devices
3\. Select your classroom AppleTV from the list of airplay destinations.
#### **Air Playing audio**
**To output just sound over the appleTV click the speaker icon in the top right hand corner of your computer, then select the name of your classrooms AppleTV**
**[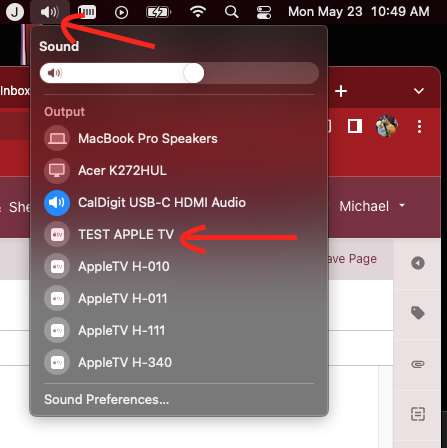](http://wiki.newburyport.k12.ma.us/uploads/images/gallery/2022-05/screen-shot-2022-05-23-at-10-49-55-am.png)**
# Printing from your Macbook to district copiers.
#### **Printing to all district copiers**
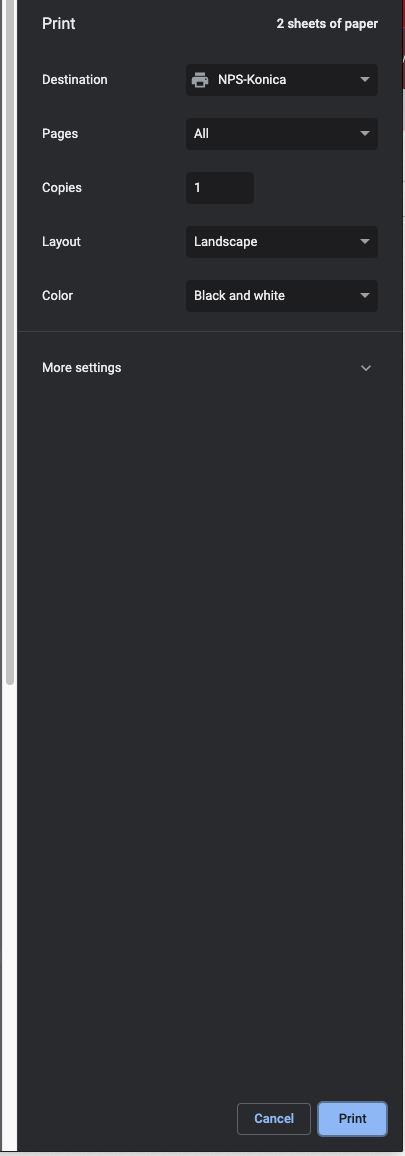
To print in MacOS either select File-> Print from the top bar or press ⌘ + P
[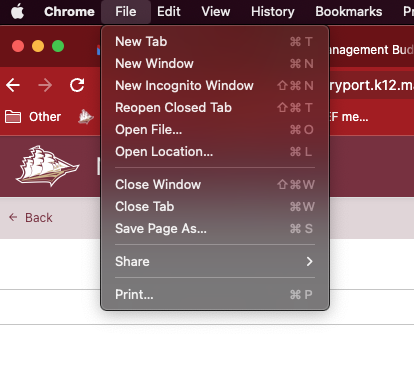](http://wiki.newburyport.k12.ma.us/uploads/images/gallery/2022-08/screen-shot-2022-08-26-at-10-29-23-am.png)
You should see a destination option called "NPS-Konica" If it is not selected, click the destination dropdown box and select it, you may have to select "see more" to pick from the full list.
[](http://wiki.newburyport.k12.ma.us/uploads/images/gallery/2022-08/screen-shot-2022-08-26-at-10-33-08-am.png)
If you are ready to print, Press print and you can use your copier code or fob to release the print job at any district copier.
#### **Advanced Printing Features**
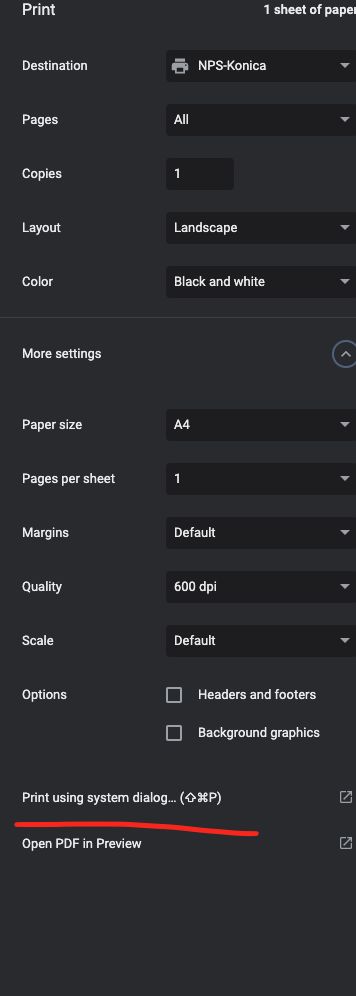
To access advanced printing options, select Print using system dialog.
[](https://wiki.newburyport.k12.ma.us/uploads/images/gallery/2023-10/unnamed.png)
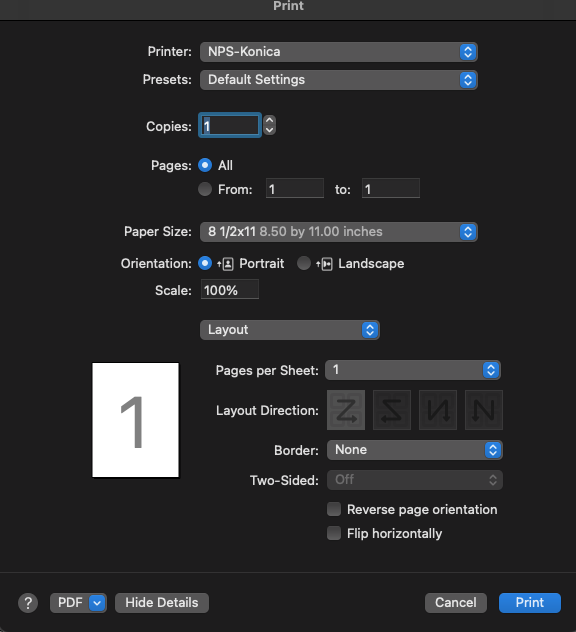
From there you'll see the print settings, you may notice that Two-Sided printing is greyed out **This is normal and 2 sided printing is not set here. To set that please click the layout dropdown box and select Layout/Finish**
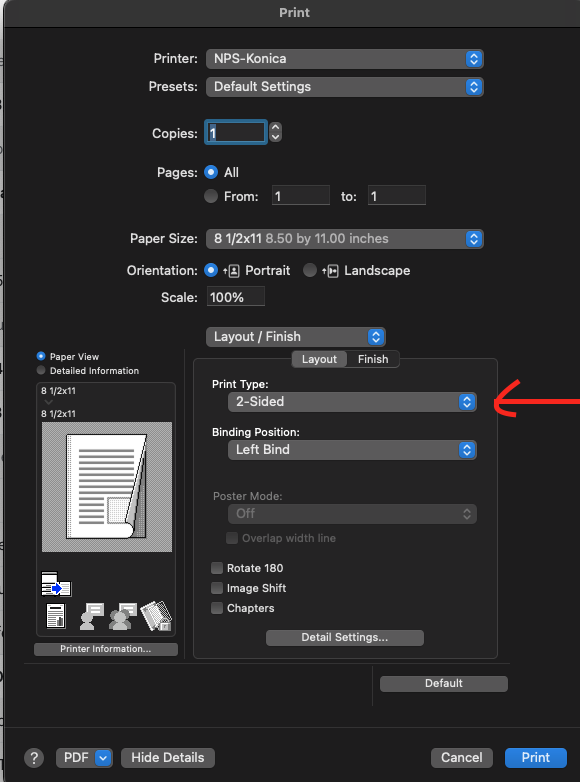
Here you can set binding and select from 1 sided 2 sided and booklet style printing.
[](http://wiki.newburyport.k12.ma.us/uploads/images/gallery/2022-08/image-1661524645088.png)