
How To Manage Your Monitor And Projector
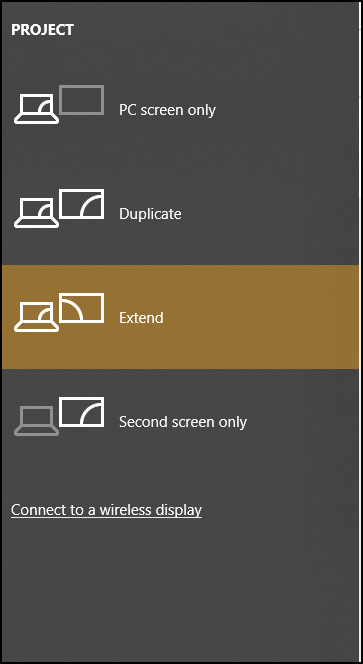
You have the option to run different display modes in your classroom. In this menu your projector is treated and labeled as a “screen.” By default we set your computer to “Duplicate.” Whatever is on your display will also be shown on your projector. You can switch to “Extend mode” allowing your desktop monitor and projector to operate as independent “screens.”
Press and hold [windows key]+[p] (Remember “p” as in project)

If you are running in extended mode and want to move a window to the other screen (e.g. from desktop monitor to projector) there are two ways to accomplish this. First, you can use the mouse, click on it, hold and drag it to the other screen or use the keyboard by holding [windows key] + [shift] then use the arrow keys to shift the selected window to the other screen.
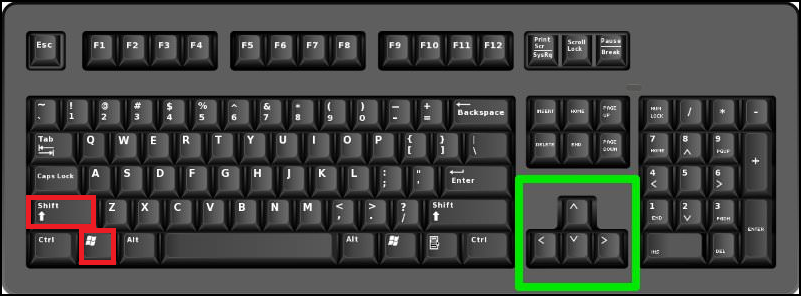
*NOTE When in “Extend” mode the only way to run the Elmo software (Image Mate) in full screen and on the projector in is to maximise it then use the [windows key] + [shift] arrow key method.