
Introduction to Printing and Scanning
Print Destination and Copier Queues
When you print from any district managed device you will see NPS-KONICA listed as a print destination. If not, you may need to click "See more"more..." in the print destination menu.

When you print to any NPS-KONICA print destination (there are several for redundancy), your print job will be sent to the copier queue. This allows you to release and print youyour job at any copier copier.in the district. To pickrelease upand print your print job you justjob, go to aany copier (color or black and white) and login to release your print jobs.login.
Copier Login
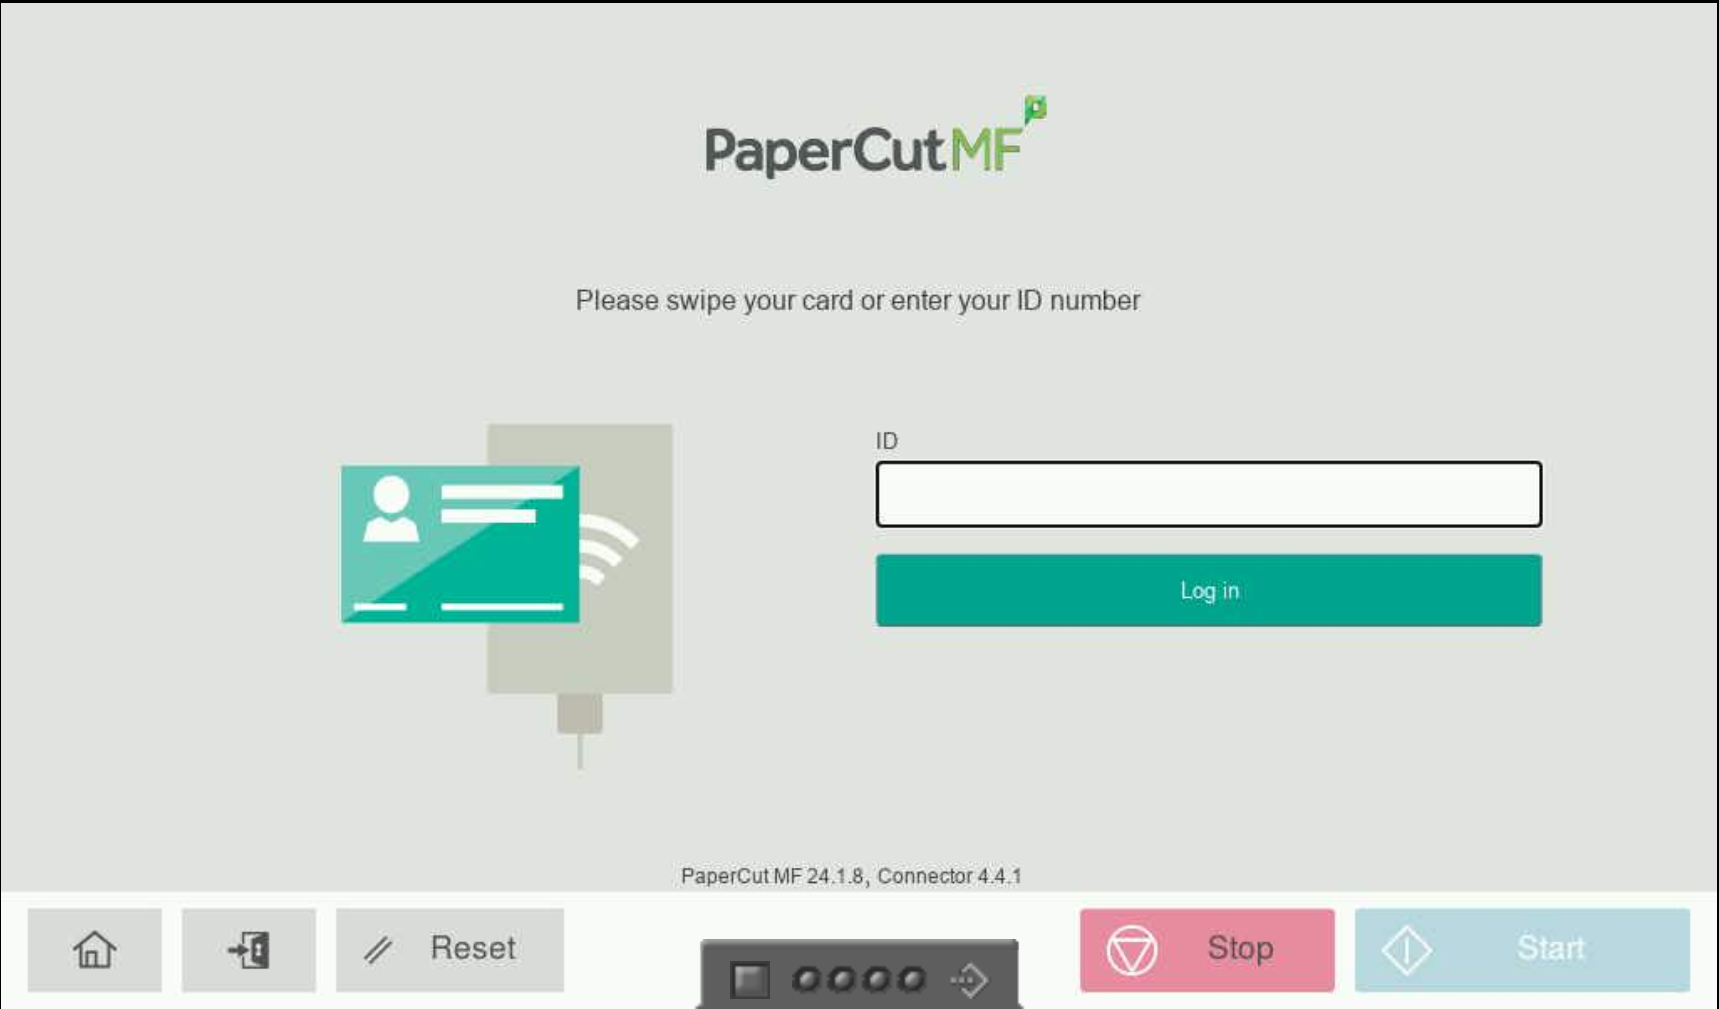
When you approach a copiercopier, you will see this dialog on the screen,screen. you can then eitherEither enter your 4 digit copier ID to login, or swipe your security fob across the rectanglerectangular black and blue card reader on the copier to login. If you've never used your fob to log in to the copiers, you may be asked to enter your username and password. This is the same username and password you use for your computer, email, etc.
Copier
OptionsIf you wish to quickly release and print any pending jobs in your queue, you can press Print All from this main page,page. orOr you can select from the following options.
options:
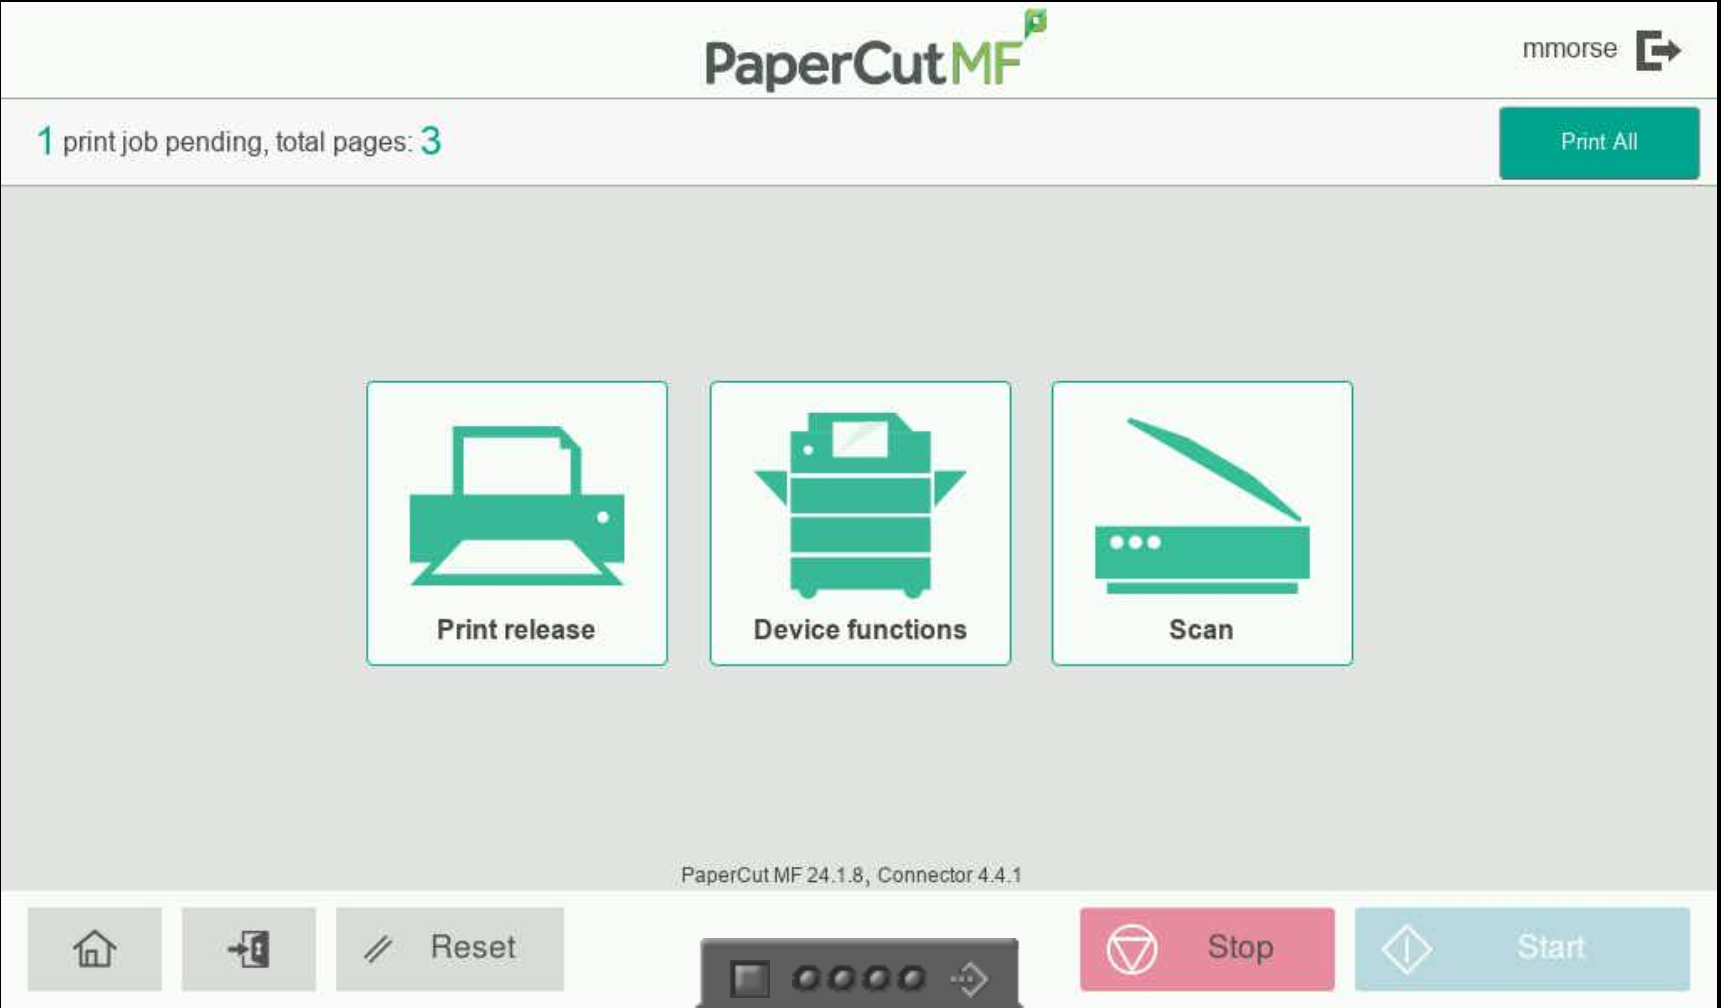
Print Release
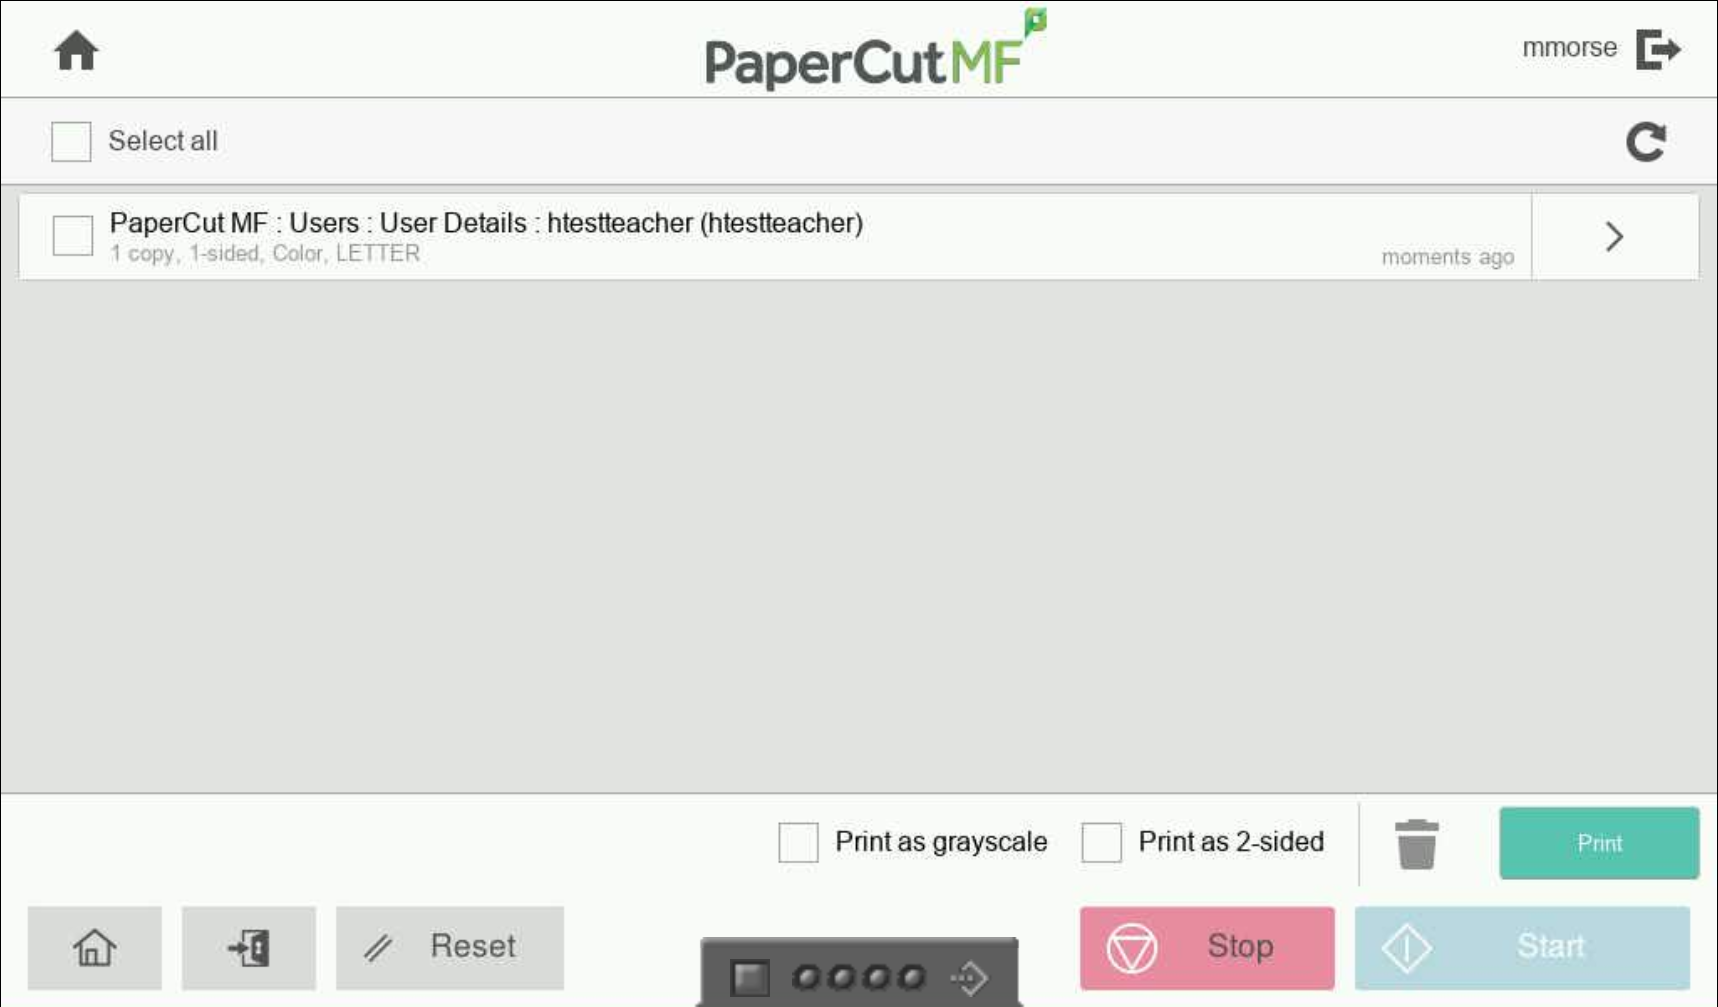
Once in detailed print settings you can specify greyscale, 2 sided and other print options, then check the box for desired documents and hit print to release them.
Scan
- Scan to my email : Sends a high detail color, text PDF to your email address
- Scan Large Document: Sends a compressed low quality monochrome scan, this is ideal for 50+ page scans that must fit in an email attachment (25mb or more)
- Scan to NPS user: This function allows you to type in an email destination to scan directly to another staff email.
- Google Drive: Scan directly to your google drive, this is the preferred option for most use cases as it allows very large, high quality color scans, the first time you use this feature you will receive an email will be requesting to allow papercut to send files to your google drive, afterwards scans can go directly into your google drive.
